To really understand how people use your website or app, and to get much better insights for your business, you should use Google Analytics 4.
This checklist covers everything you need to set it up, starting with the basics like your account, property, data stream, and the actual tagging, but it also includes more advanced setup many teams don’t bother with.
Before you start…
Doing some planning beforehand will save you loads of time and problems later. Before you begin with GA4, get these thoughts organized:
-
Project plan
What are you hoping to do with this project? Start with a broad list of what you want to implement (e.g., phone call tracking, e-commerce, lead generation) and the order in which you want to implement them.
-
Deliverables and exclusions
What are you aiming to get from this, and what’s not included? You might say you want to track certain user actions and create particular reports, but you won’t be using some of GA4’s other tools.
-
Milestones and timeframes
What are the important things you hope to accomplish along the way (like setting up the account, launching it, reviewing it), and when do you want to have them done?
-
Requirements
What tools, permissions, and support will you need for the project? You may want to write down things like having a testing and live versions of your site, and who has access to what, including your Content Management System (CMS), Google Tag Manager (GTM), or the GA4 Admin section.
-
Risks
What could delay the project? Consider issues like the website changing during the work, limits imposed by third-party companies, or how getting people’s consent to track affects things.
-
Ownership
We advise having one GA4 account for each company, and one GA4 property for each of your brands, websites, or apps.
-
Measurement plan
What are your business goals (like revenue or new leads)? How will you turn those into key events GA4 can track (such as a purchase or generate_lead)? What additional details (parameters) will you need to record with those (for example, the transaction ID, the value, and the currency)?
-
Access and roles
Who needs Admin (full control), Editor (setup), and Analyst/Viewer (reporting) access? For security reasons, we recommend using the Principle of Least Privilege (PoLP), which means only giving people the least amount of access they actually require.
Okay, now we can start!
1) Create an account
If you already have an account and you only need to create a new property, skip to step 2). To create an account from scratch:
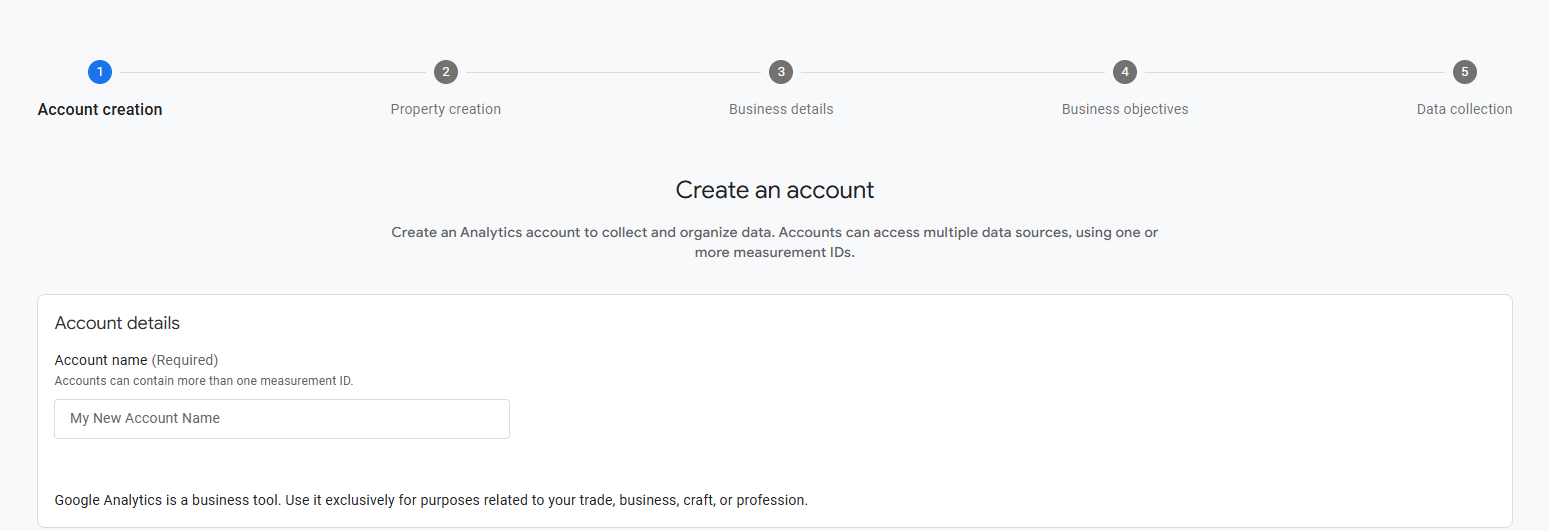
- Start by following the link to create a new account.
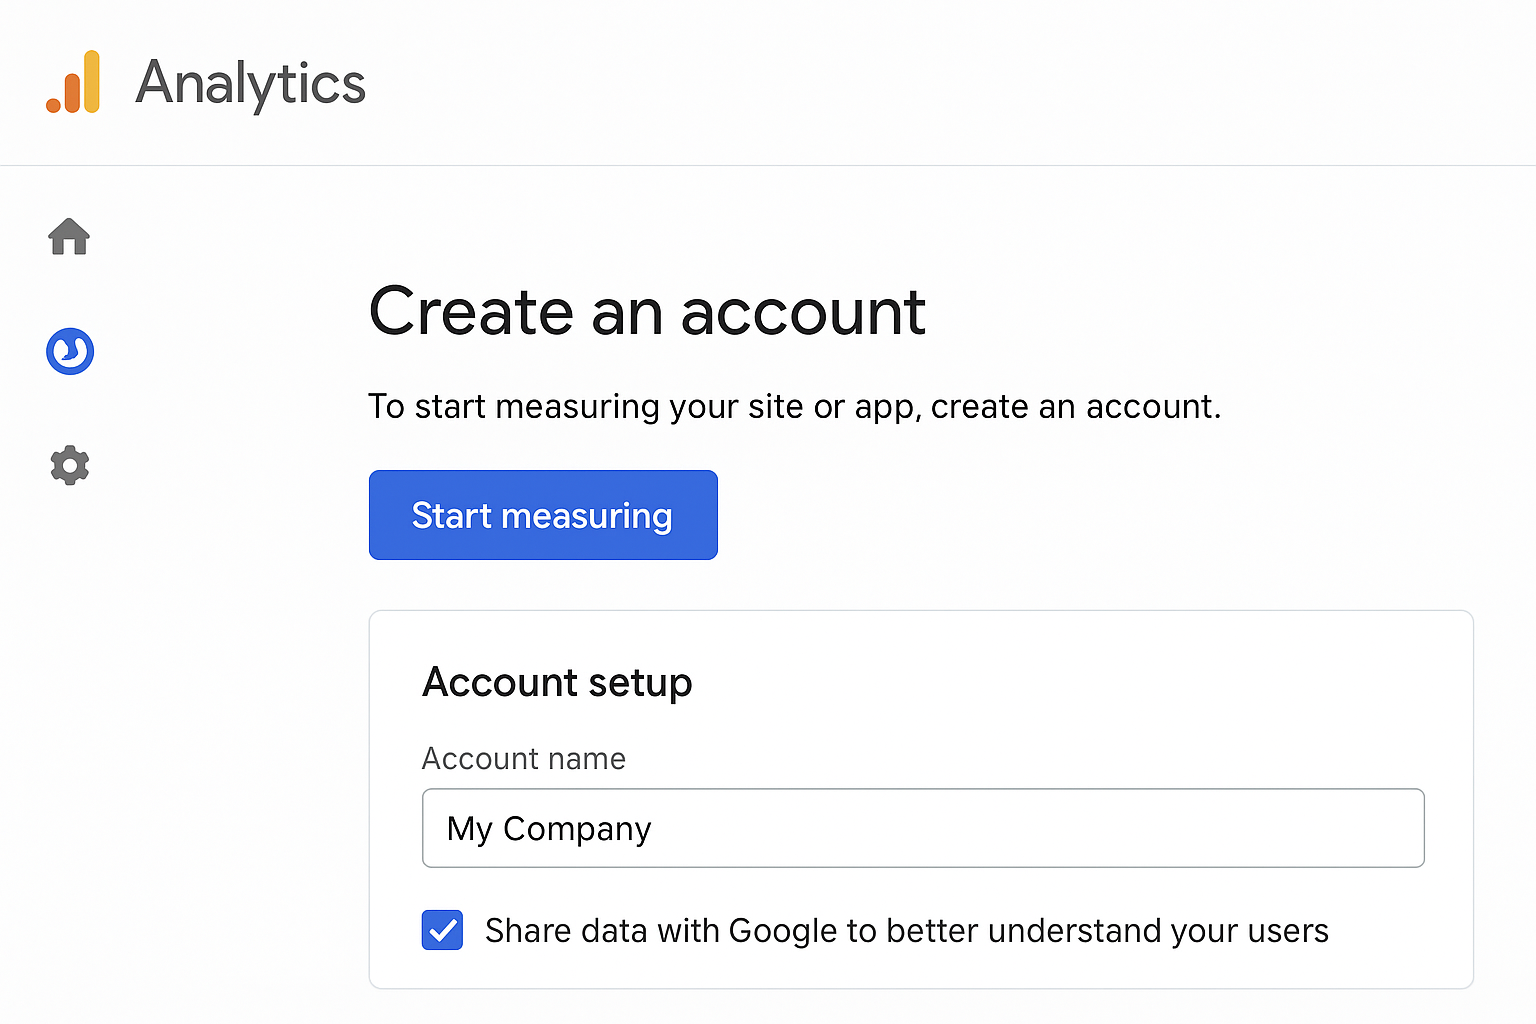
- Click Start Measuring.
- As advised before, name the account after your legal entity or project.
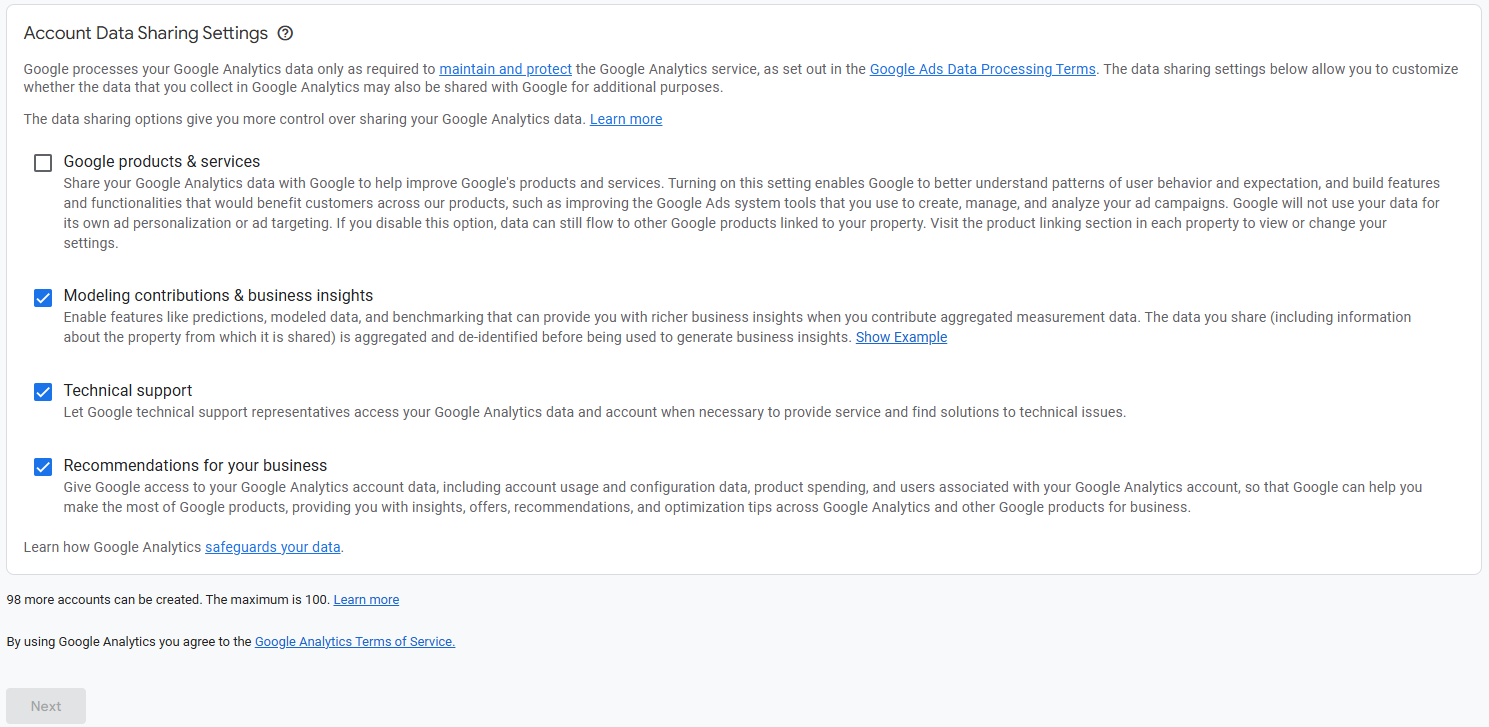
- Leave default data-sharing options as needed, since these don’t affect tracking quality.
- Click Next to add the first property.
Tip: keep one account per company. Use separate accounts only if you manage unrelated businesses.
2) Create a property
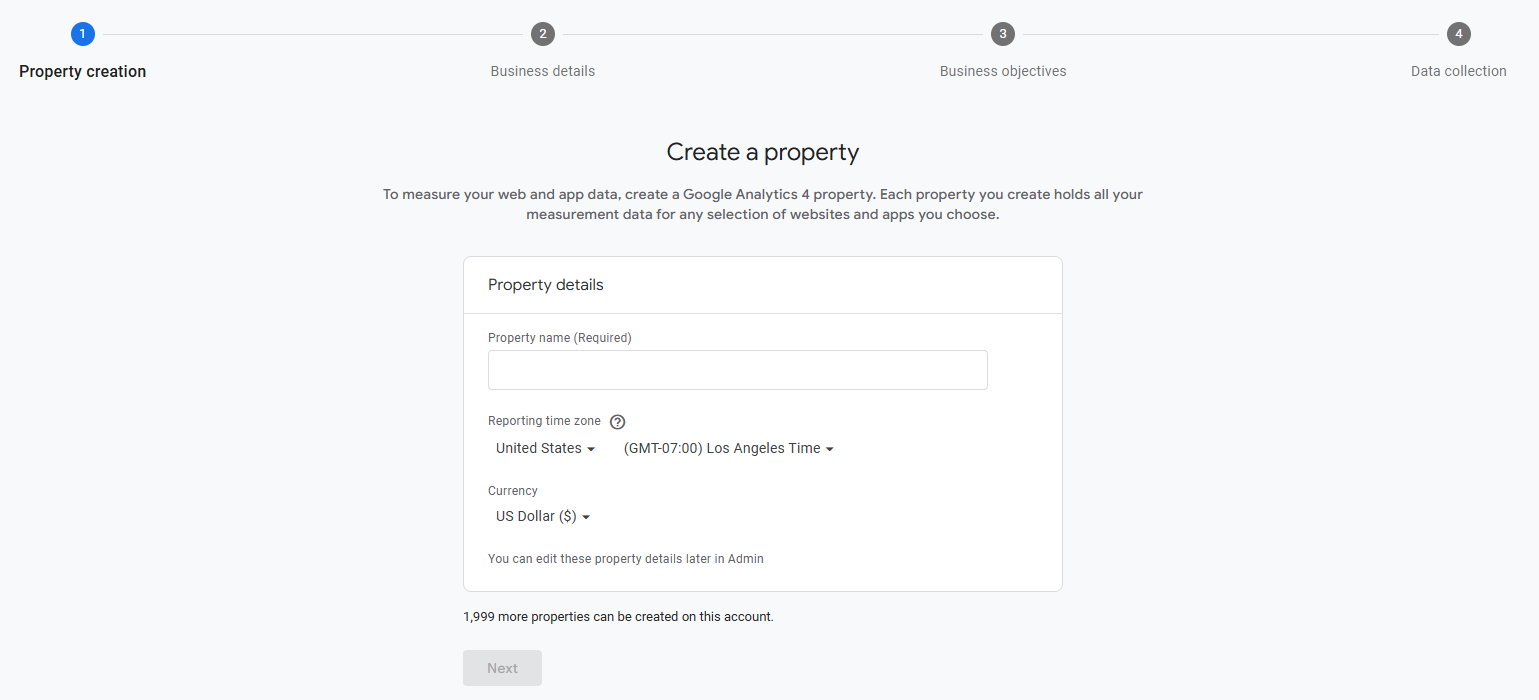
- If you’re continuing from the end of the previous section, skip to 2.2. Otherwise, first go to Admin > Create > Property.
- Name the property clearly (after your website, for example), select the reporting time zone (e.g., United States – Los Angeles time) and currency (e.g., US Dollar).
Tip: time zone and currency affect how conversion value and day boundaries show up in reports.
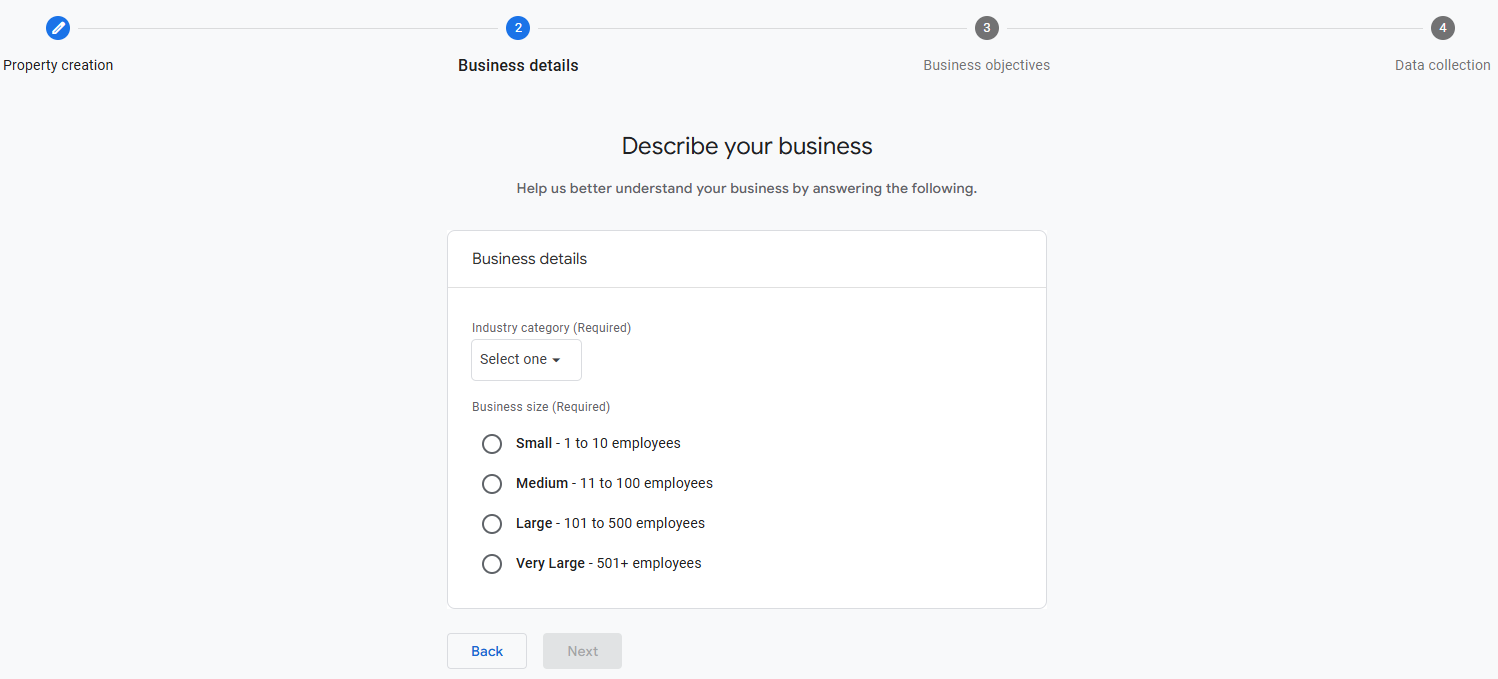
- Click Next. Complete the business information prompts (industry category and business size).
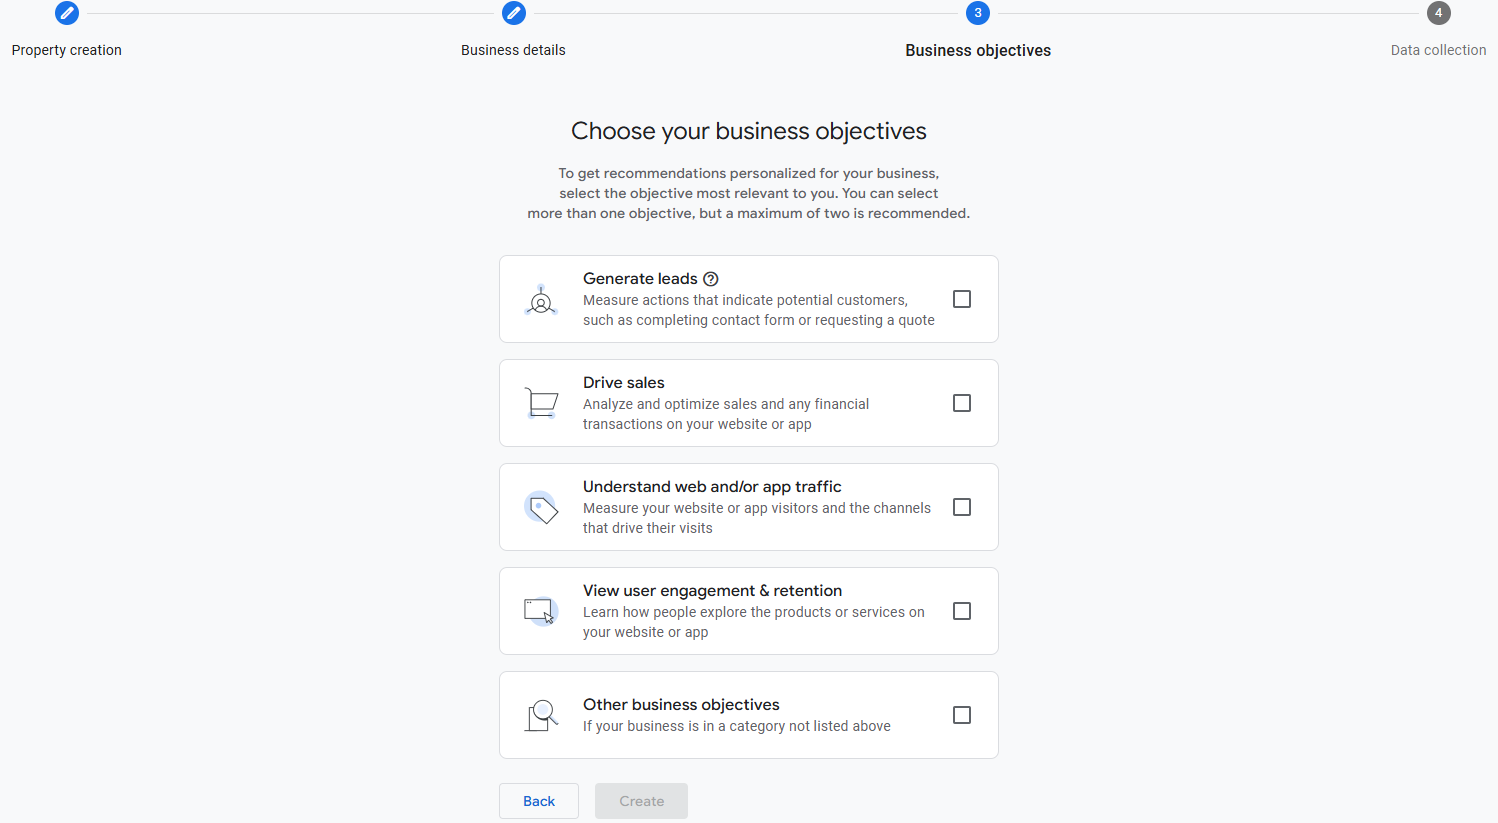
- Click Next. Select how you intend to use Google Analytics. This information will determine the set of default reports that GA presents to you.
- Click Create and accept the Analytics Terms of Service and the Data Processing Amendment.
3) Add a data stream
- If you’re continuing from the end of the previous section, skip to 3.2. If not, first go to Admin > Data collection and modification > Data streams.
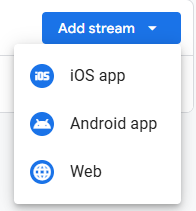
- Click Add Stream.
- Select iOS app, Android app, or Web.
-
For an iOS or Android app stream:
-
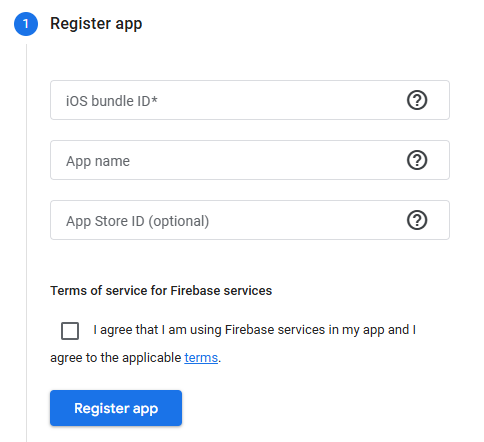
Start by entering the iOS bundle ID or Android package name, the app name, and, for iOS only, the App Store ID. Click Register app.
-
Click Next and follow the instructions to download the configuration file for the app.
-
Click Next and follow the instructions to add the Google Analytics for Firebase SDK to your app.
-
Click Next. Run your app to make sure the installation was successful and that the app is communicating with Google servers.
-
Click Finish.
Why a Firebase SDK? When an app data stream is set up, Google Analytics creates a corresponding Firebase project and app data stream, and automatically links the Firebase project to your property, if your project and property are not already linked.
-
-
For a web stream:
-
Enter your website URL and stream name.
-
On the web stream details panel, you can find your Measurement ID (looks like G-XXXXXXX).
-
You can either enable or disable Enhanced Measurement. We recommend that you leave it ON so that GA4 can automatically track common interactions like page views, scrolls, site search, file downloads, among other events.
-
Click Create & continue on top of the page.
-
Tip: you can also click on the Settings button next to Enhanced Measurement to fine-tune what’s auto-collected.
Congrats! You have just set up your Google Analytics 4 account and property. Now it’s time to start collecting, analyzing, and making the most of your data. Here are a few basic features to get you started.
4) Install the Google tag
There are a couple of ways to do this, but we recommend using Google Tag Manager. This process is described in detail in the article “How to set up Google Tag Manager on your website”.
5) Run a quick verification
Before you spend time configuring everything else, now is a good time to confirm that GA4 is receiving data and that everything is flowing correctly at this stage:
- Browse your website (preferably in an incognito window).
- Go to GA4 Reports > Realtime.
You should see at least one active user (you) and your page title/page path appearing. If you see nothing, verify you’re in the correct property, disable ad-blockers, and double-check the Measurement/Tag ID.
- For a deep check:
-
In GTM, click Preview. Enter your website URL and Connect.
-
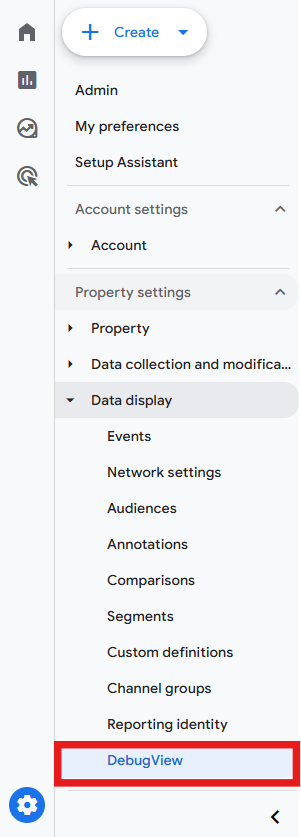
In GA4, check Admin > Data display > DebugView for event/parameter detail.
-
Perform a few actions on your website, so in DebugView you should see a timeline of events.
-
Click an event to confirm parameters.
-
So, if URLs update as you navigate, and events show with the parameters you expect, everything is looking good!
6) Essential Admin settings to do early
These settings in the Admin panel shape how GA4 stores, filters, and attributes data. If you skip them now, you’ll spend weeks fixing reports later.
-
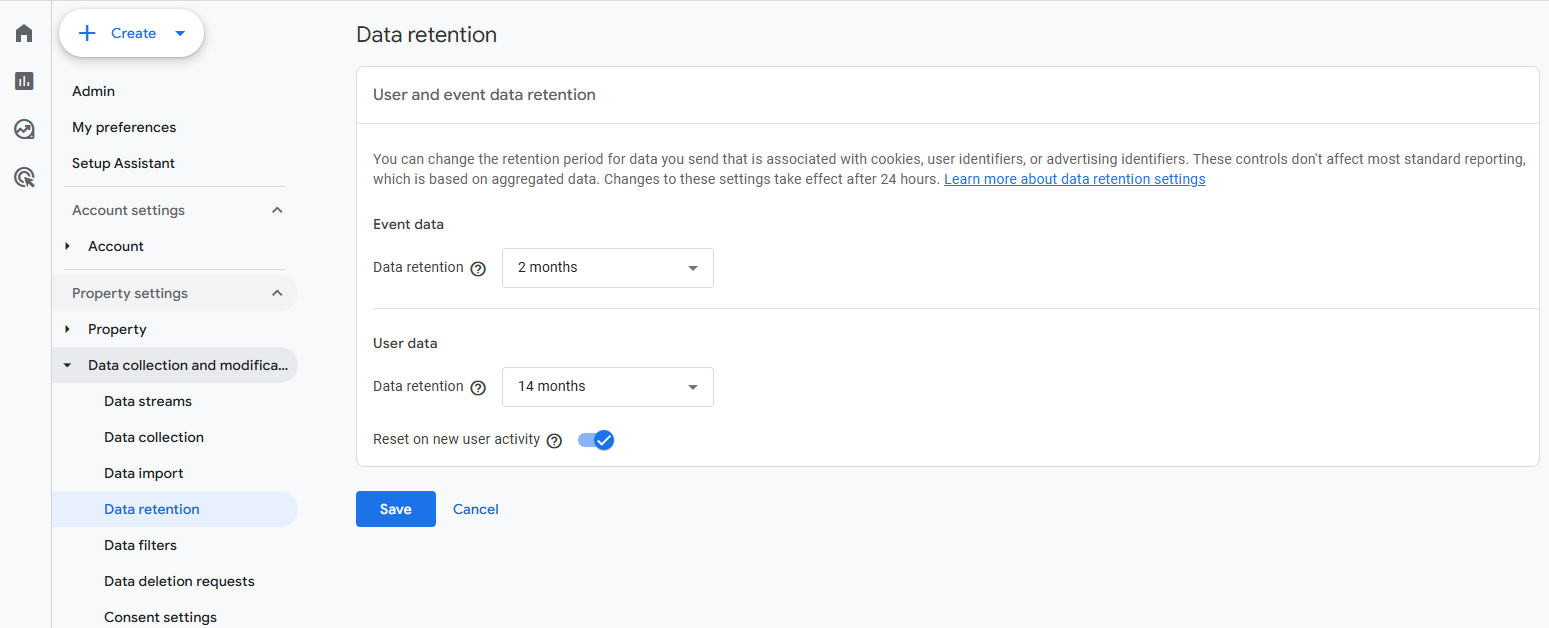
Data retention
By default, GA4 retains user-level and event-level data for only two months. So, if you want longer retrospective analysis and year-on-year comparisons, go to Data collection and modification > Data retention > Set Event Data Retention to 14 months (if your policy allows).
-
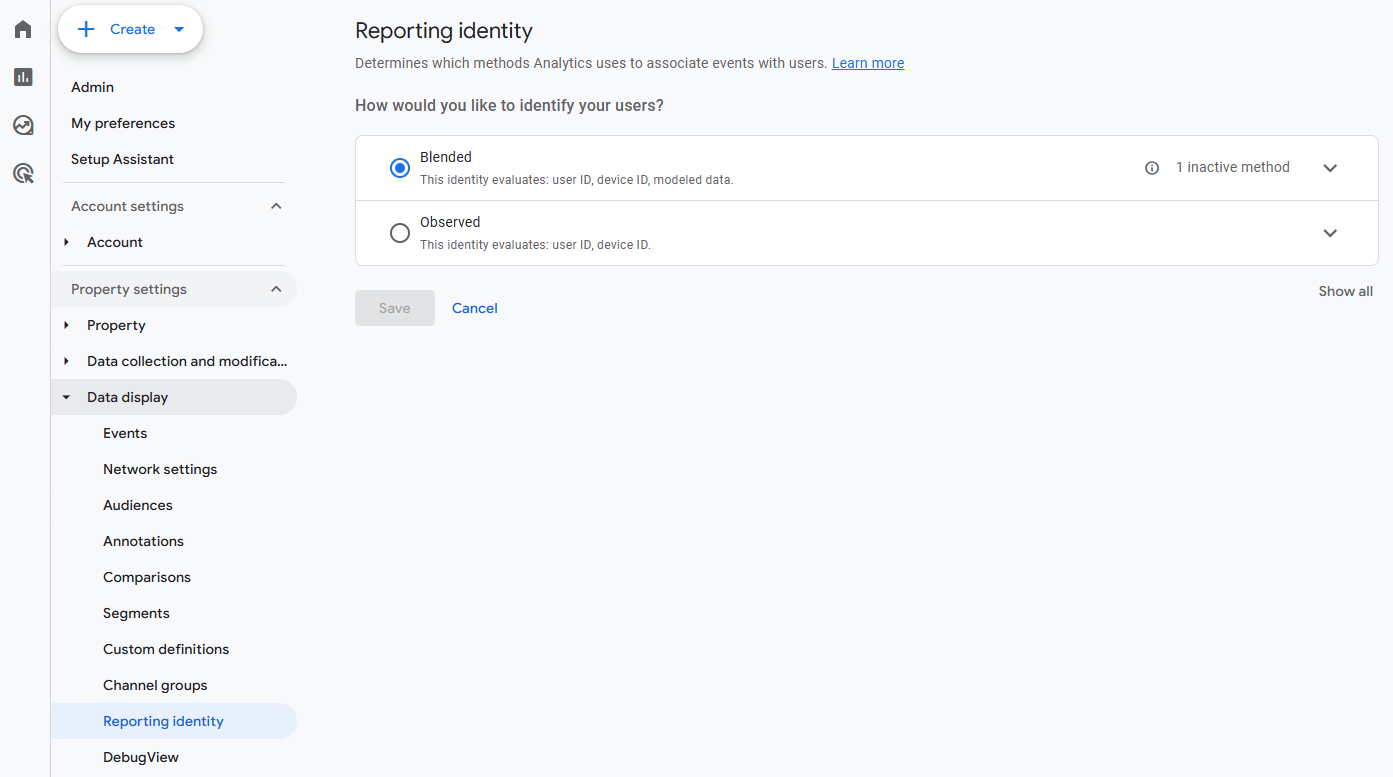
Reporting identity
For more stable counts, you can ensure the platform is blending device signals and modeled users. For that, go to Data display > Reporting identity. Keep the option “Blended” unless you have a reason to change.
-
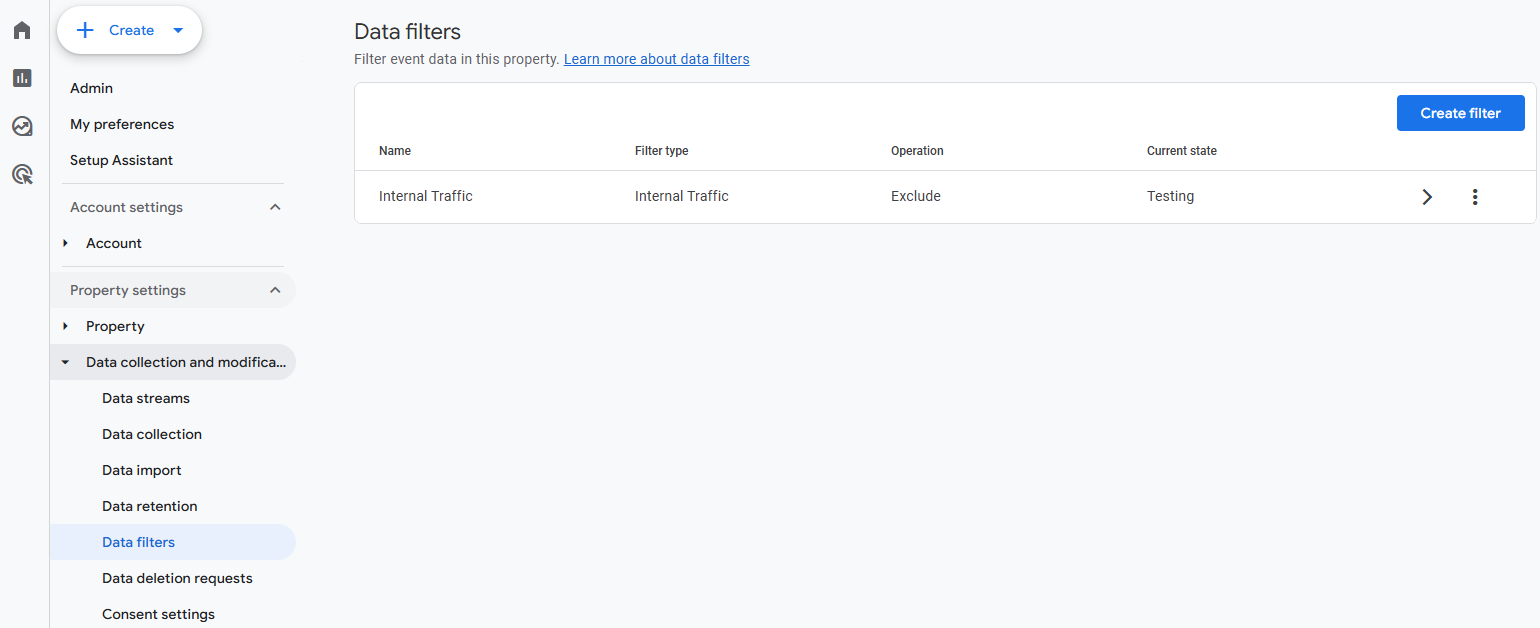
Internal traffic filter
Go to Data collection and modification > Data filters > Create filter > Internal traffic. You can define this using IP rules to filter traffic from users within your organization, ensuring your website or app analytics data is accurate and reflects only external user behavior.

-
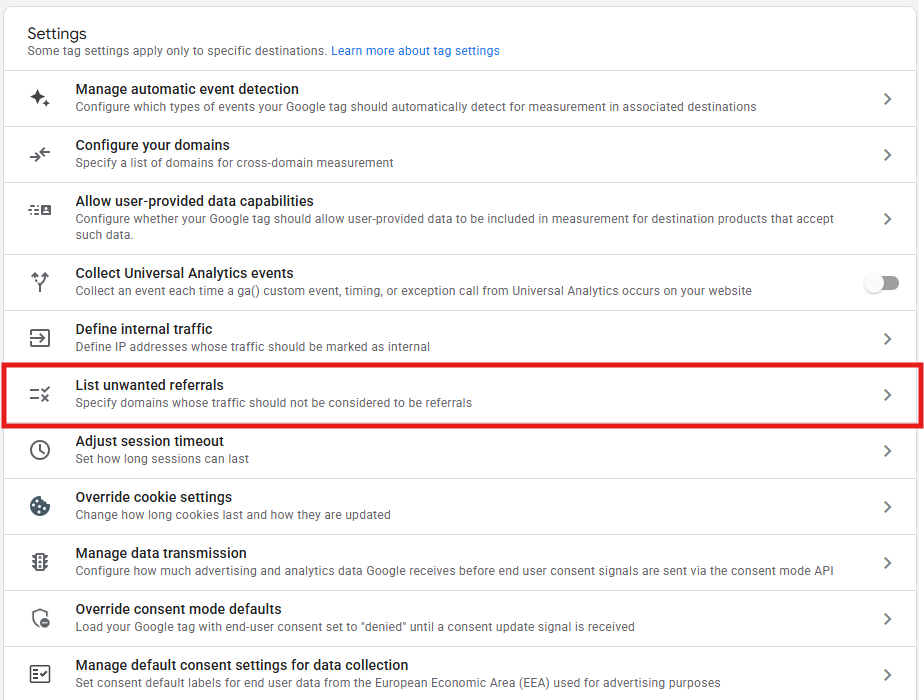
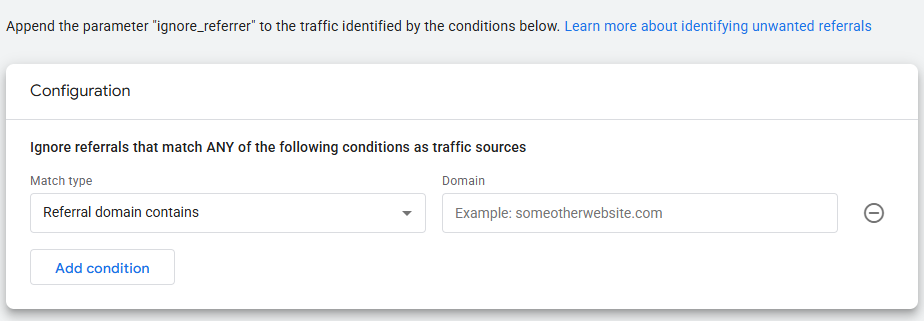
Unwanted referrals
To prevent conversions from being attributed to the gateway “referral” instead of the true source, navigate to Data collection and modification > Data streams > Web > Configure tag settings > List unwanted referrals. Add payment gateways (e.g., paypal.com) or authentication domains.
-
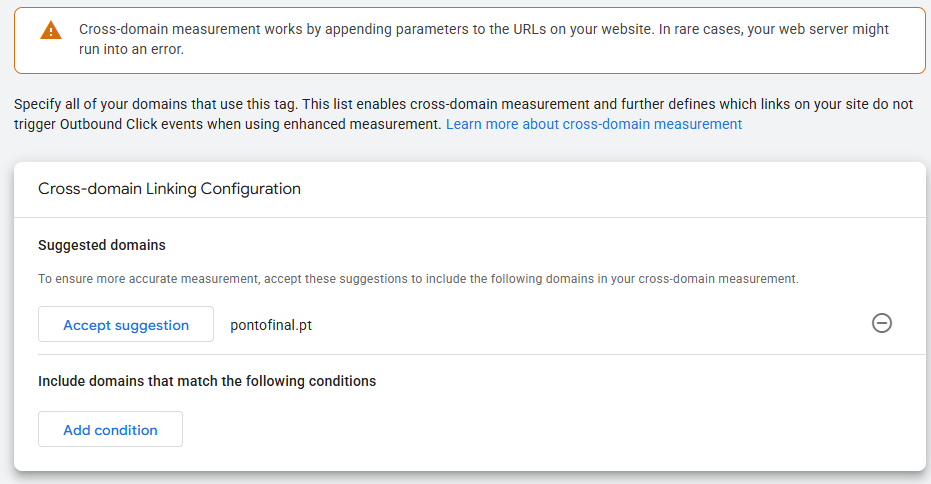
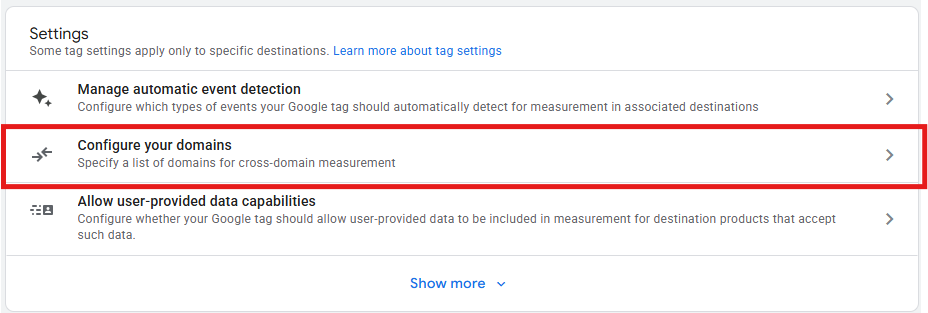
Cross-domain measurement
If users switch between multiple domains, go to Data collection and modification > Data streams > Web > Configure tag settings > Configure your domains. Add every domain/subdomain in the journey, to keep sessions intact and preserve attribution across domains.
-
Consent Mode (recommended in EU/UK)
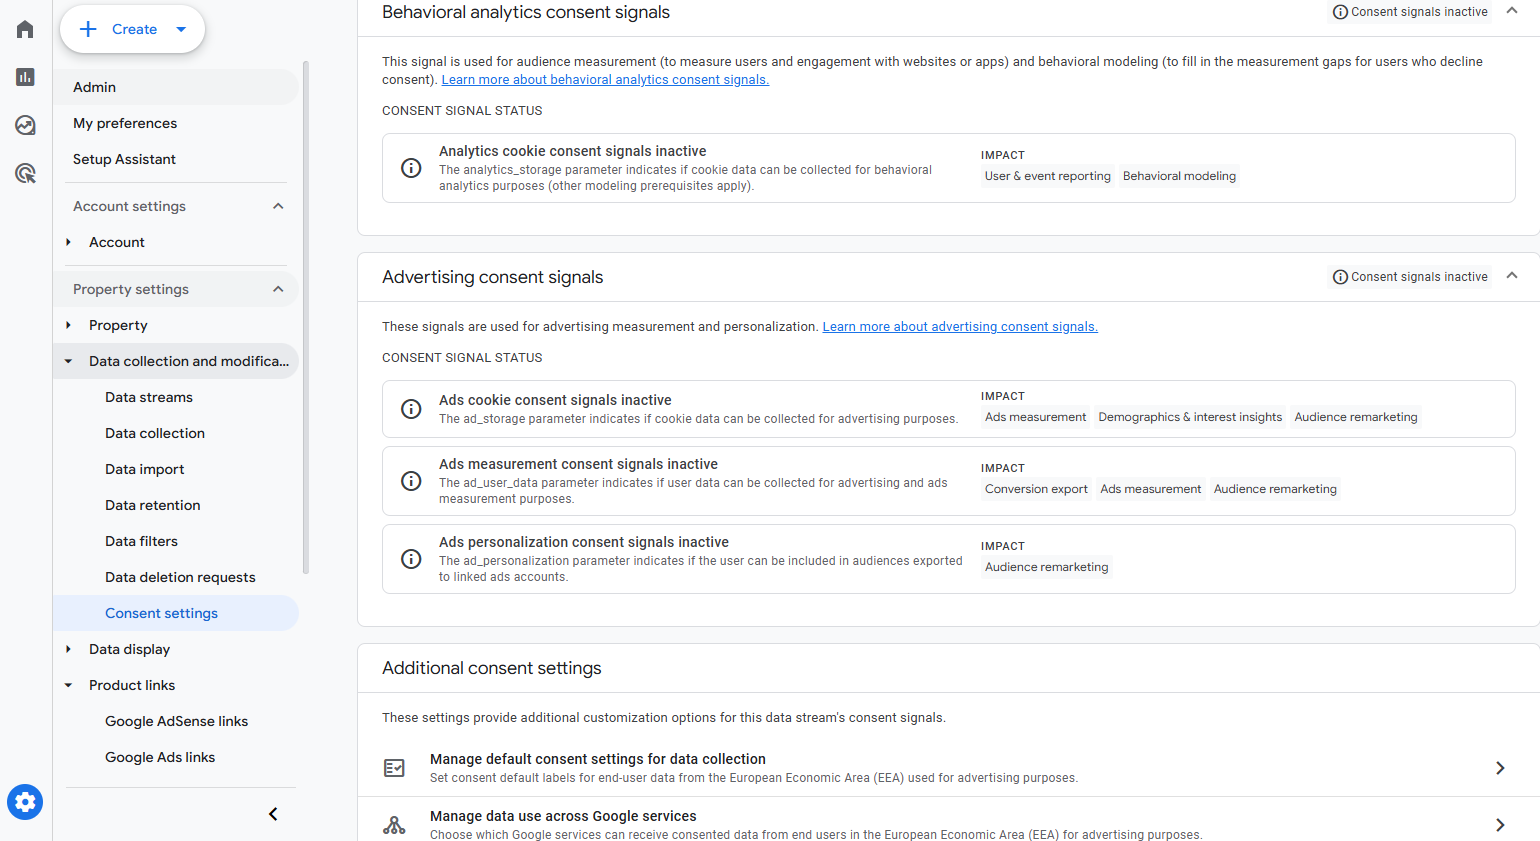
If you are using a cookie/consent banner, set up Consent Mode (using Google Tag Manager or gtag) so Analytics respects those choices and fills in the gaps where it can. Also, make sure Analytics works with your Consent Management Platform (CMP). Then, for checking and setting things up, in GA4, go to Data collection and modification, then Consent settings, and manage the consent settings for each of your data streams that use Consent Mode.
-
Site search
To allow access to search terms reports with no custom work, go to Data collection and modification > Data streams > Web > Web stream details > Enhanced Measurement. Confirm the query parameter your website uses (often q, s, or search), and edit if needed.

-
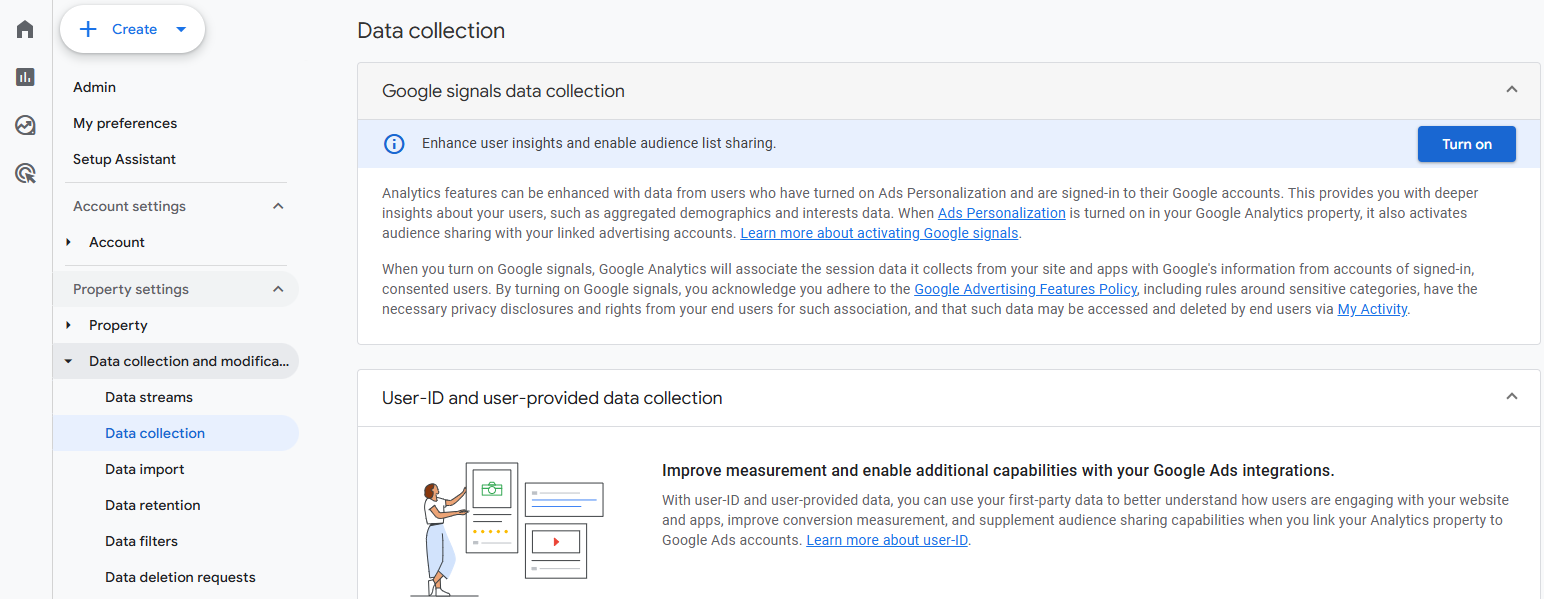
Google signals data collection
To allow audience ads and demographics in reports, navigate to Data collection and modification > Data collection > allow “Google signals data collection”.
-
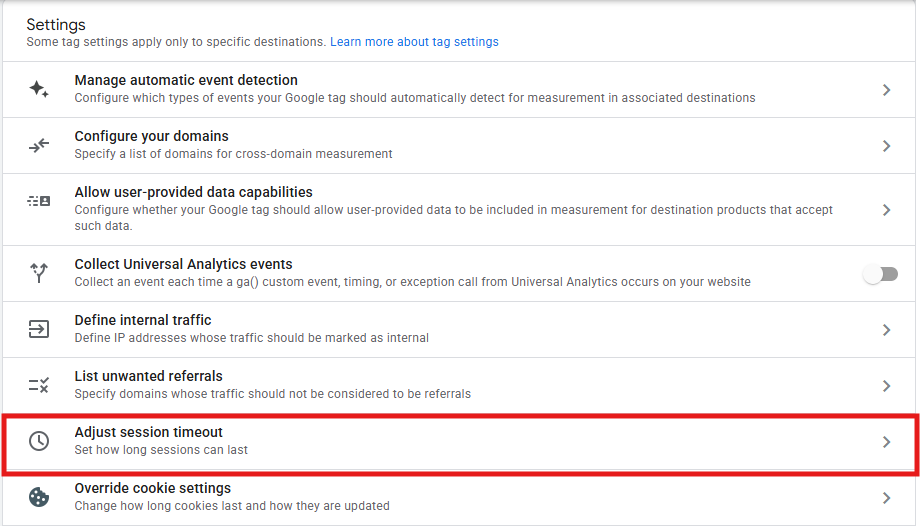
Adjust session timeout
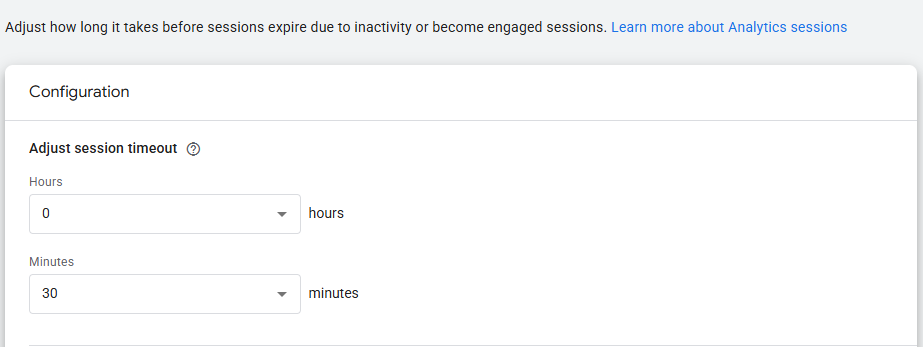
To prevent legitimate long sessions from being split artificially, go to Data collection and modification > Data streams > Web > Configure tag settings > Adjust session timeout. For long B2B sessions, extend (up to 7h 55m); otherwise keep it default for short journeys.
-
Timer for engaged sessions
While you’re adjusting the session timeout, in the exact same area, you can also adjust the timer for engaged sessions. Since the default 10 seconds is too “soft” for most websites, increase it to 60 seconds so “engagement” actually means engagement.
-
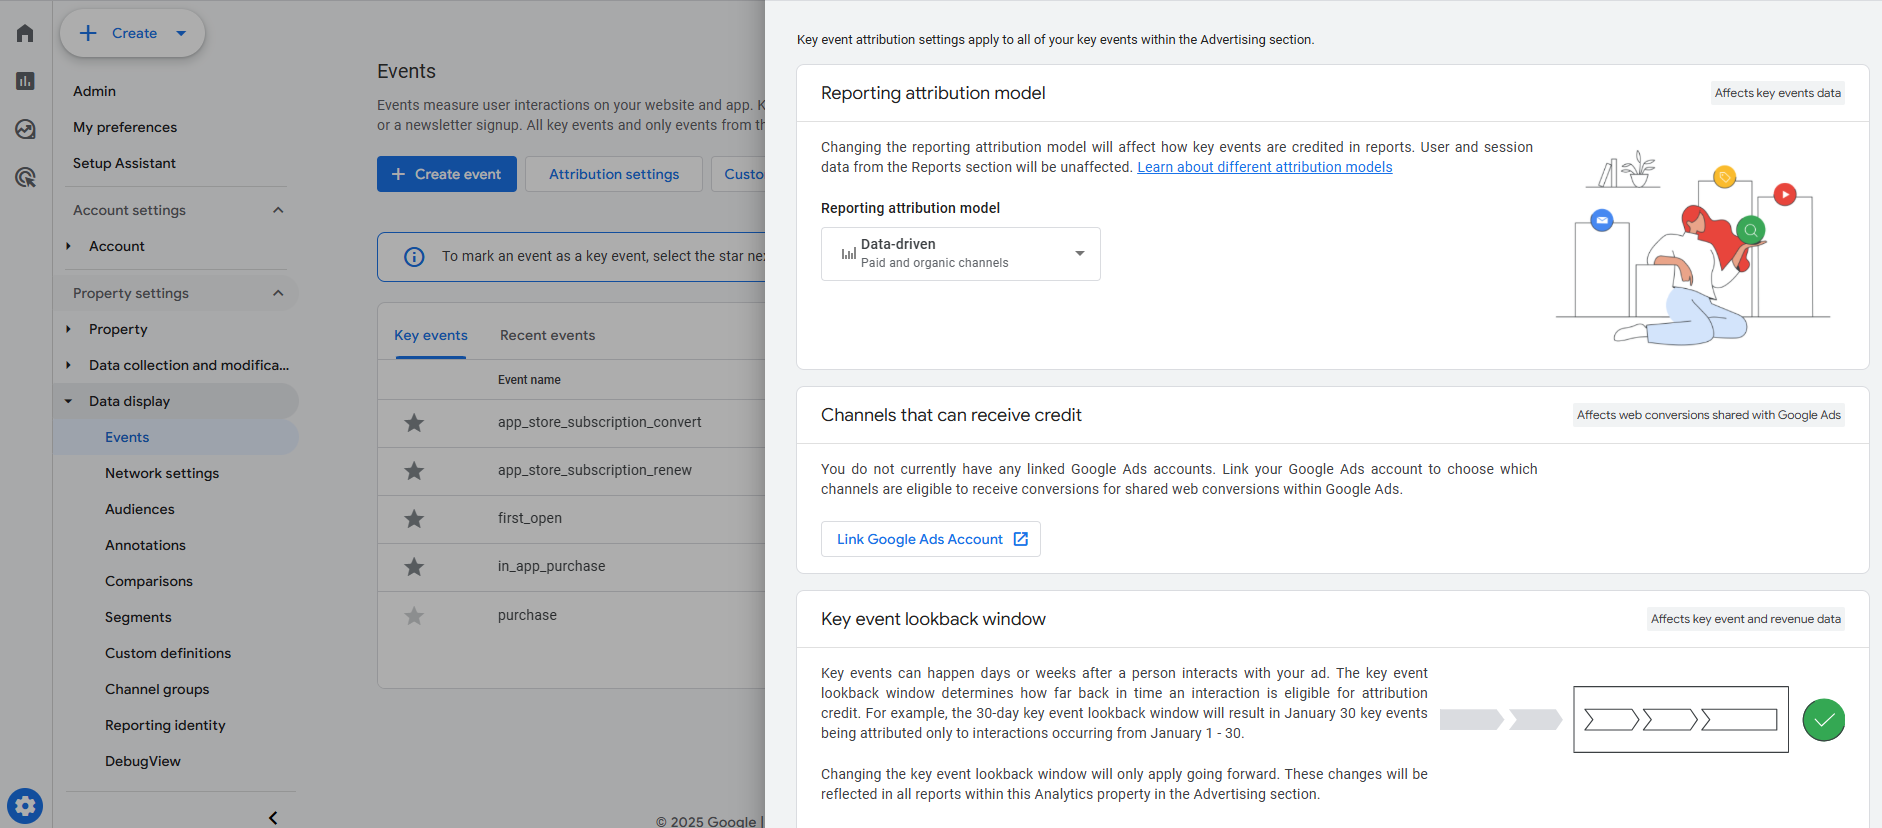
Choose the reporting model
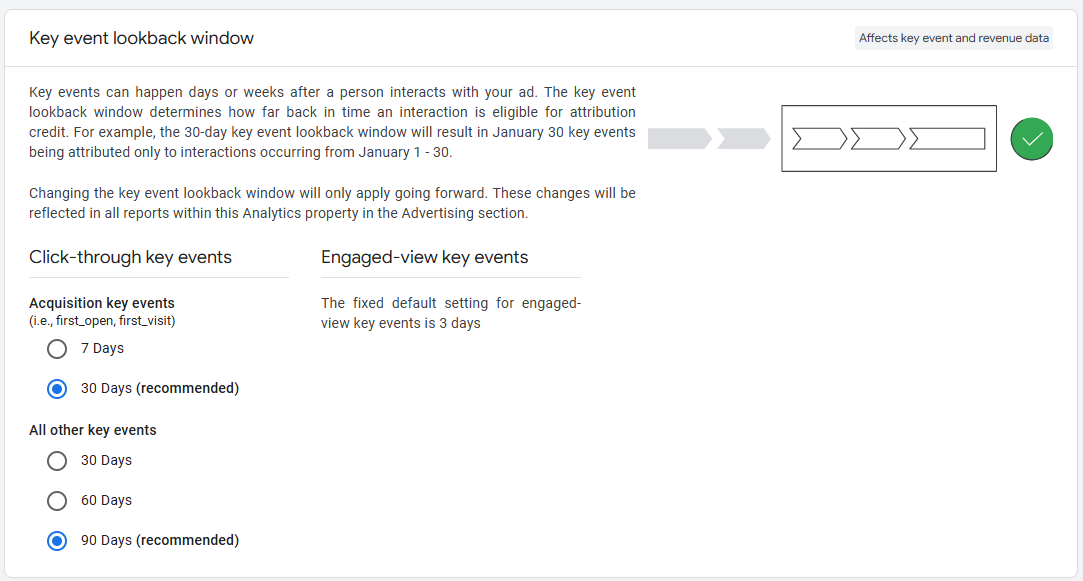
To make sure your reports match your business reality from day one, go to Data display > Events > Attribution settings > Reporting attribution model > Keep Data-driven. And since you’re there, scroll down to the “Key event lookback window” section and set lookback windows now (you’ll also get a chance to refine that ahead).

7) Define key events & mark conversions
Do you remember the measurement plan you made earlier? Now’s the time to get it and decide which events you’ll use to show what “success” looks like (these are your conversions).
-
Go to Google Tag Manager and create GA4 Event tags with the required parameters (we go through how to do this in the article “How to set up Google Tag Manager on your website”). Here’s an example of how to create an event tag for a lead form submission:
- Tag: GA4 Event > Event name (e.g., generate_lead).
- Parameters: form_id, form_name, page_location.
- Trigger: Form Submit (refine to the specific form).
-
Preview & test in Google Tag Assistant. Then, confirm in GA4 DebugView.
-
Now in GA4, to mark events as key events (conversions):
-
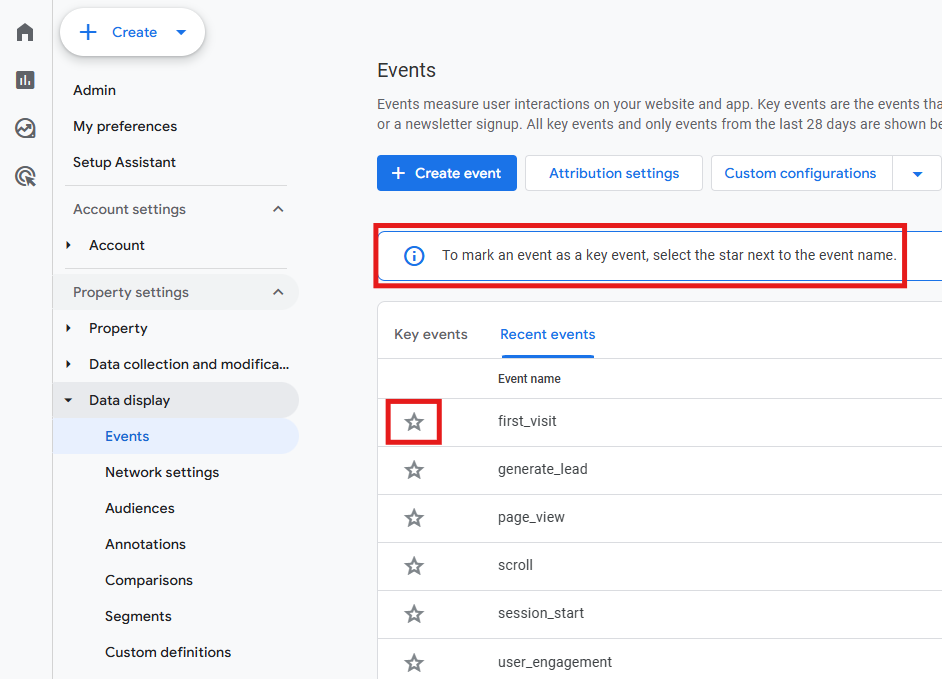
Go to Admin > Data display > Events > Recent events > click the star next to the event name to mark it as key event (for all the events that are considered success KPIs).
-
-
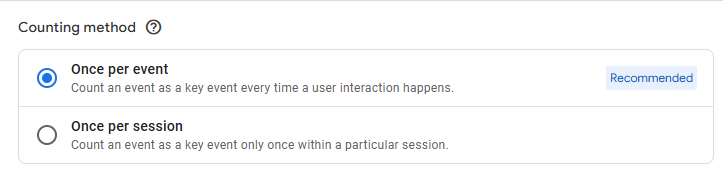
Define the counting method:
-
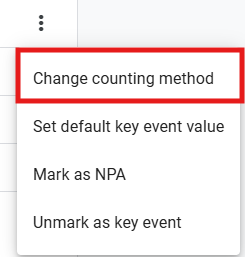
In the “Key events” area, click on the three dots to the right of each key event and select Change counting method.
-
Choose either once per session (for non-transactional conversions like sign-ups, or demo requests) or once per event (for repeatable value, multiple purchases).
-
Tip: use recommended event names where possible (purchase, add_to_cart, login, sign_up). This way, you’ll get better default reporting.
8) Set attribution lookback windows
If you didn’t do this in step 6), do it now. To get more accurate, realistic data, adjust the lookback window to match the length of your business’s sales process. GA4 defaults to 30 days, and that won’t work for all businesses. To do this:
- Go to Data display > Events > Attribution settings > Key event lookback window.
- Choose the ideal timeframe for both Acquisition key events and All other key events.
9) Create custom definitions
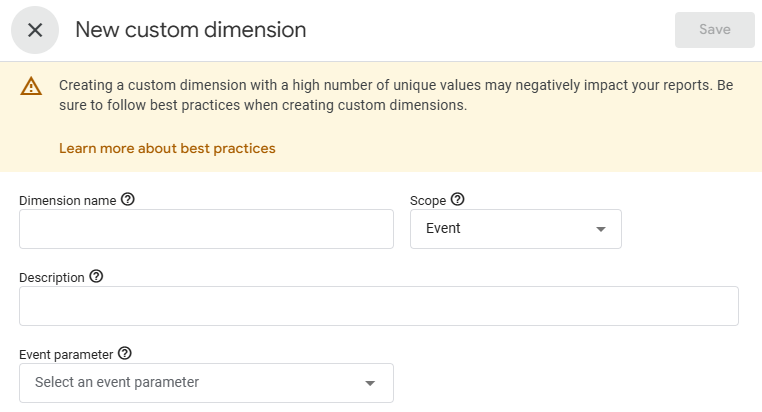
GA4 will collect any custom parameters you send, but you’ll need to register them as custom dimensions or metrics before they appear in the standard reports. Here’s how:
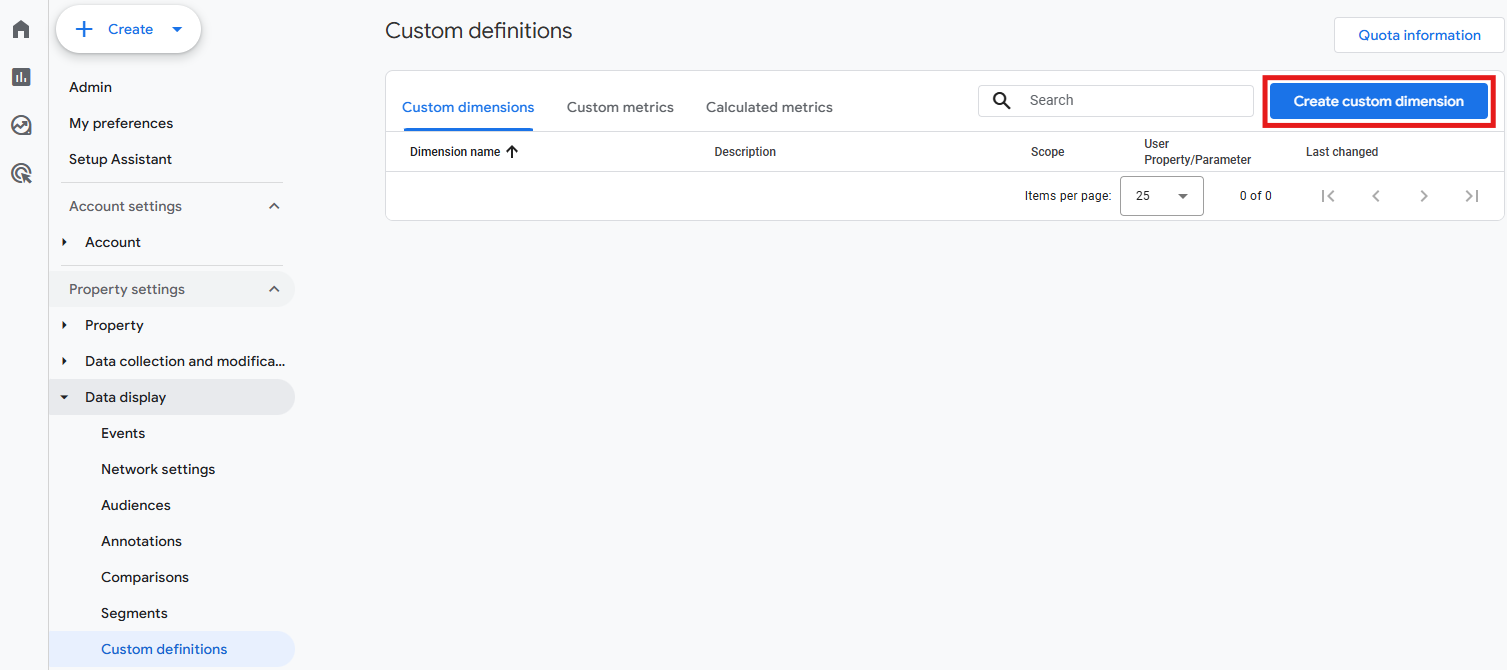
- Go to Admin > Data display > Custom definitions > Create custom dimension/metric.

- Define the scope (event), then the dimension/metric name (e.g., Form name), and lastly the event parameter (e.g., form_name).
- Save, but keep in mind that values won’t appear retroactively.
Tips: Be consistent and use lowercase in parameter names. Also, don’t register every parameter – only those you’ll report on (to avoid high-cardinality issues).
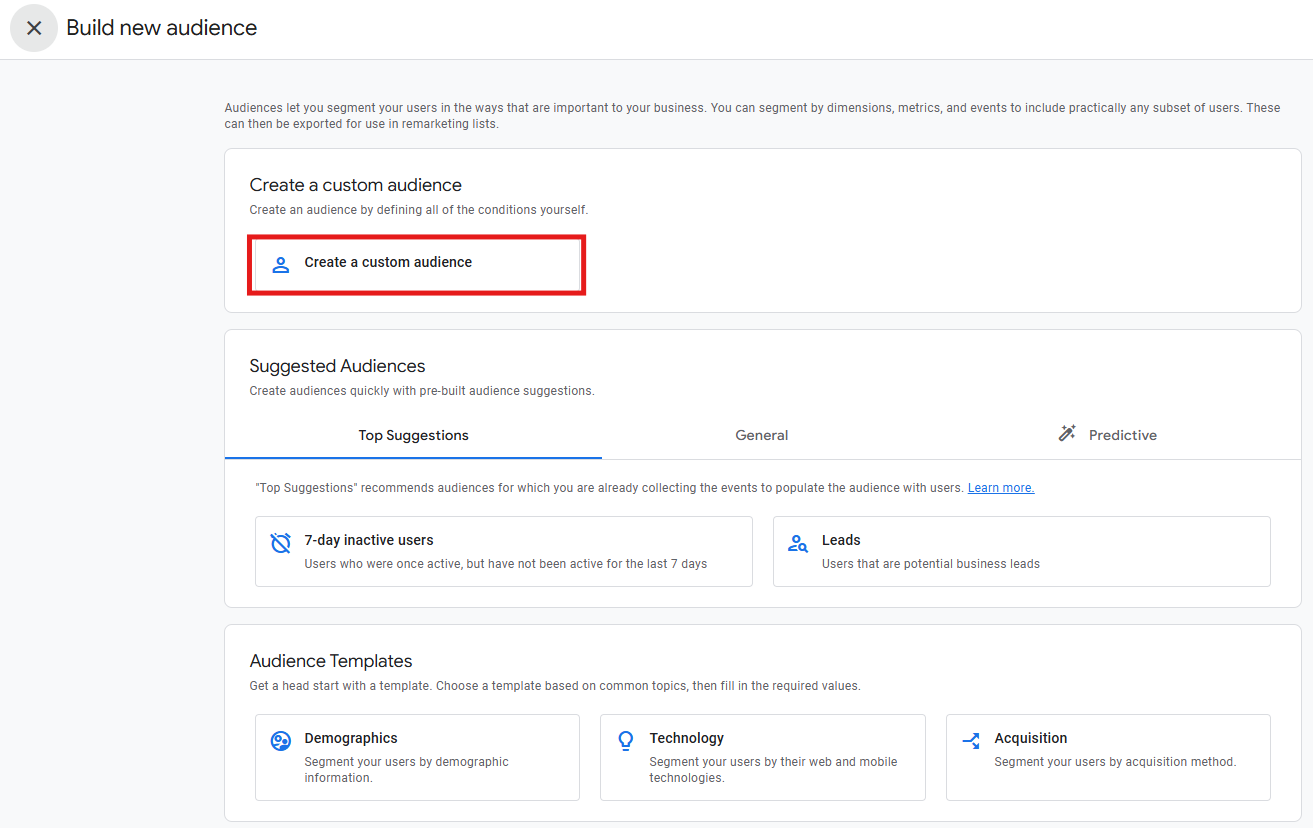
10) Create custom audiences
You can also create custom audiences to further refine your analysis. They also help you see user behavior for specific slices (e.g., users who scrolled +75%; casual browsers). To do it:
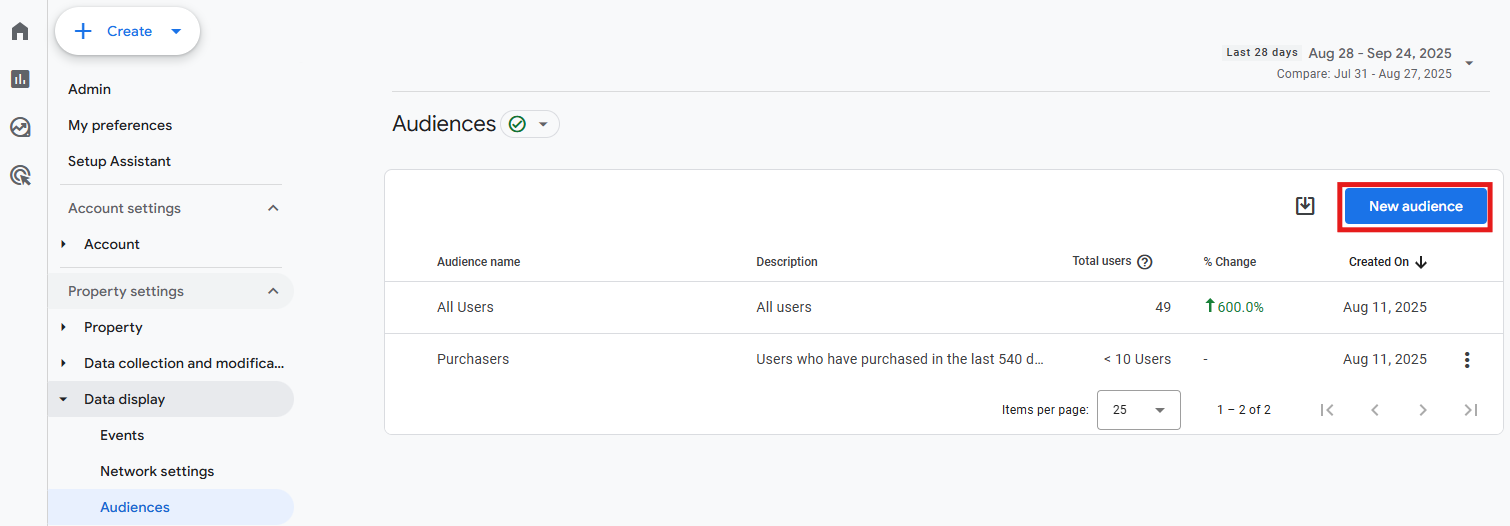
- Go to Admin > Data display > Audiences > New audience.
- Follow GA4’s suggestions that show up (like 7-day inactive users) or create a custom audience from scratch.
For an e-commerce, for example, you can create audiences such as:
- Engaged readers
- Cart abandoners (added to cart, no purchase in 7 days).
- Recent buyers (purchase in last 30 days).
11) Create a custom channel group
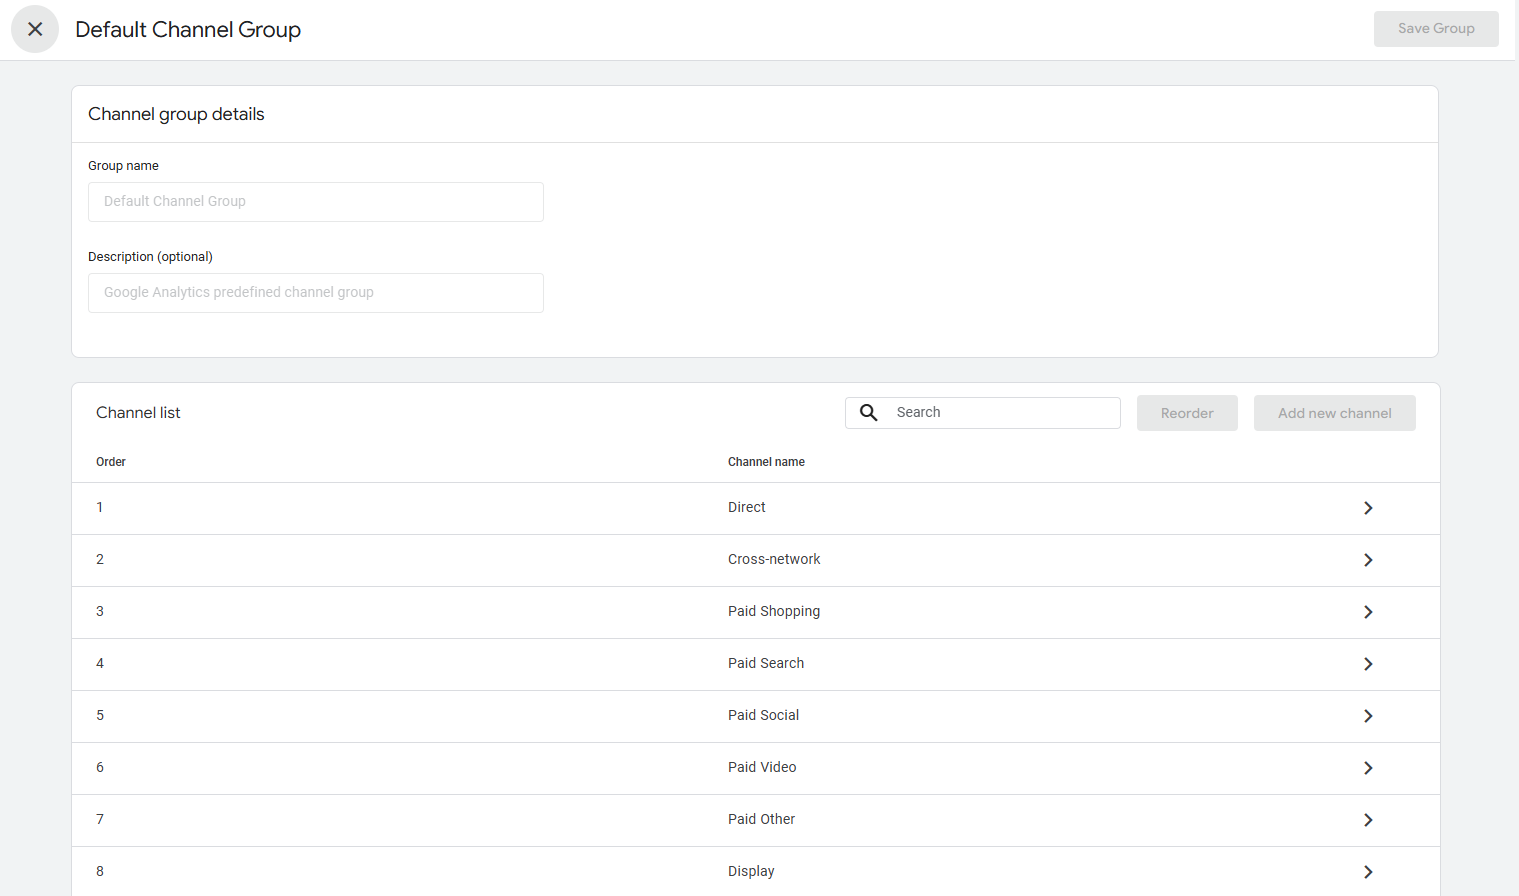
In GA4, the order of your channels (for viewing and reporting your data) is important. It’s the order GA4 uses to decide which channel a visit comes from. Because of this, having “direct” traffic at the top of the list can lead to miscategorization and give you incorrect reports.
Direct traffic should actually be at the bottom of the list. That way, GA4 will first consider all your paid and owned channels and only label traffic as “direct” if it doesn’t fit into any other category.
To create a custom channel group that matches your traffic mix, do this:
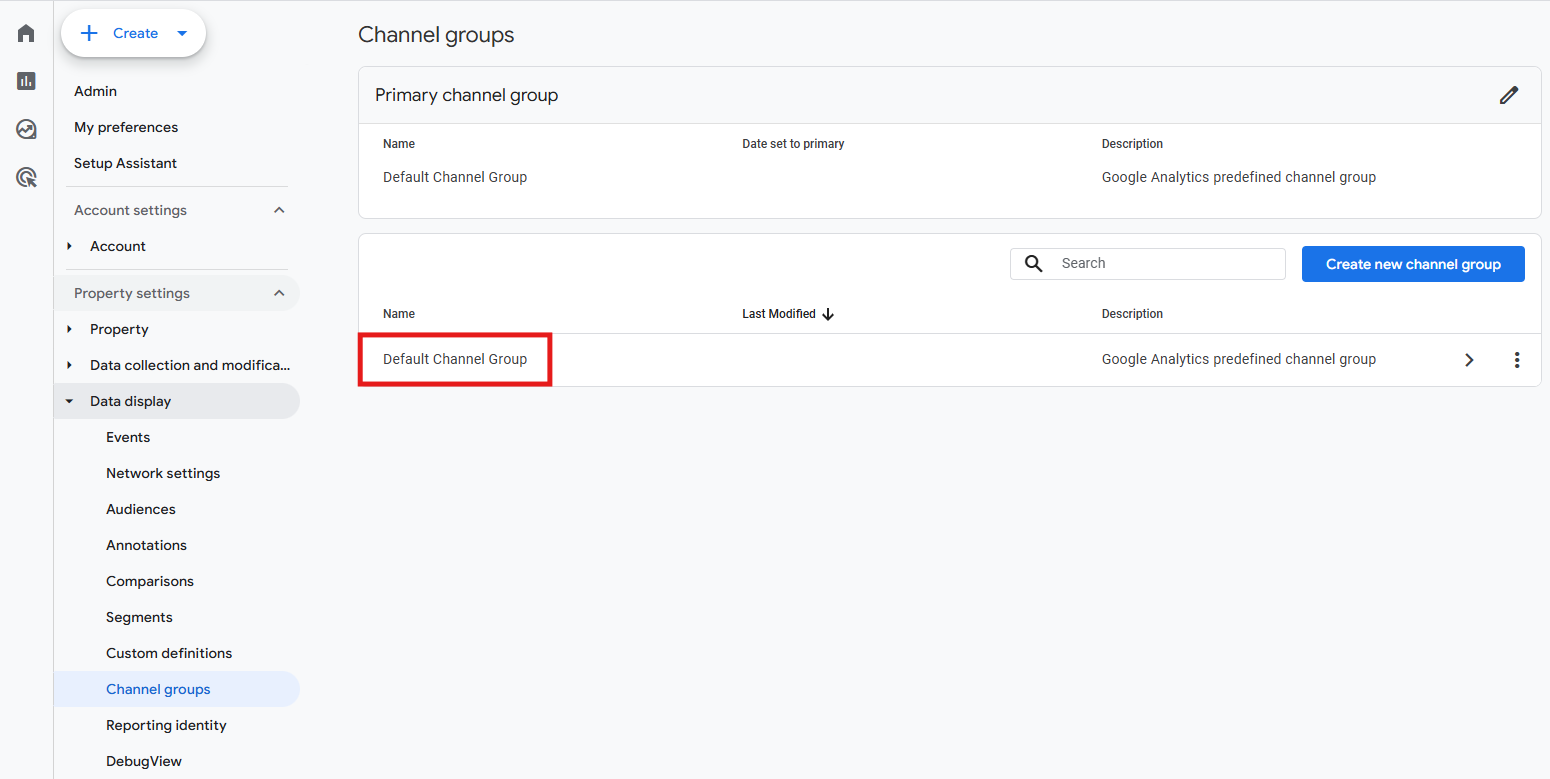
- Go to Admin > Data display > Channel groups.
- Click on the Default Channel Group and reorder the channel list as desired.
Our general recommendation of order of channels is this:
- Paid Search
- Paid Shopping
- Paid Social
- Paid Video
- Cross-network
- Display
- SMS
- Mobile Push Notifications
- Paid Other
- Affiliates
- Organic Shopping
- Organic Social
- Organic Video
- Organic Search
- Audio
- Referral
- Direct
12) Integrate GA4 with other key tools
We go through each of the most relevant integrations in other blog articles, but for now you can easily ensure this:
-
Google Ads
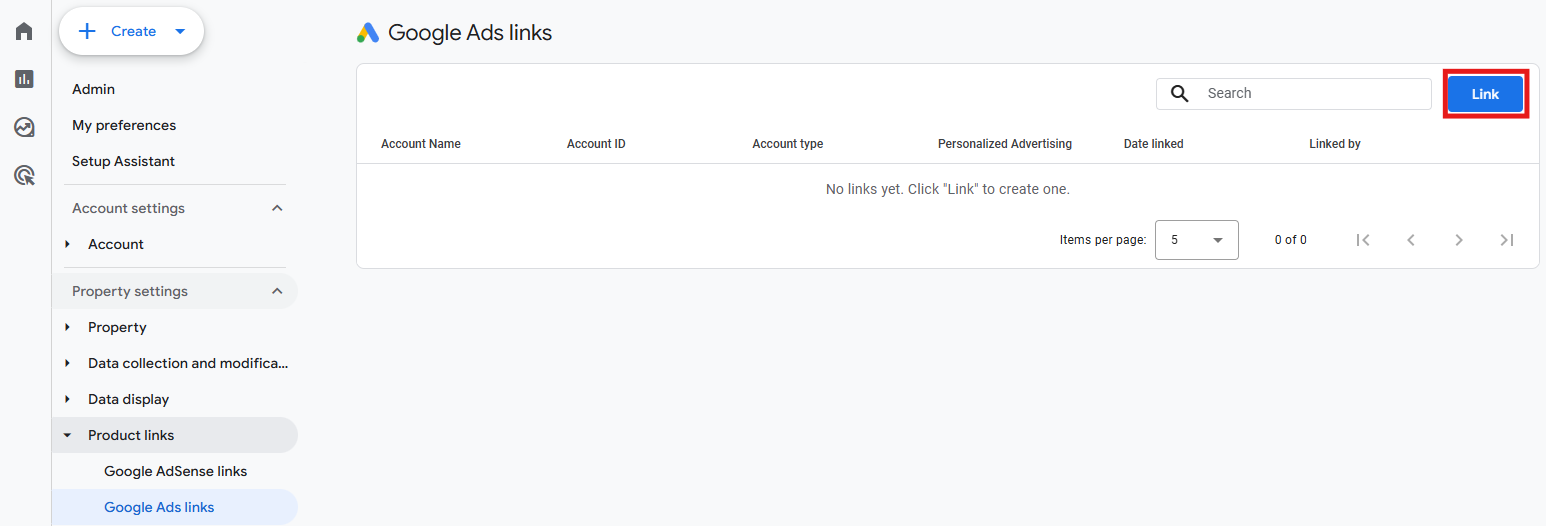
Go to Admin > Product links > Google Ads links > Link account(s). This enables correct conversion import, consistent attribution, personalized ads (if you use audiences), and ensures auto-tagging in Google Ads.
-
Google Search Console
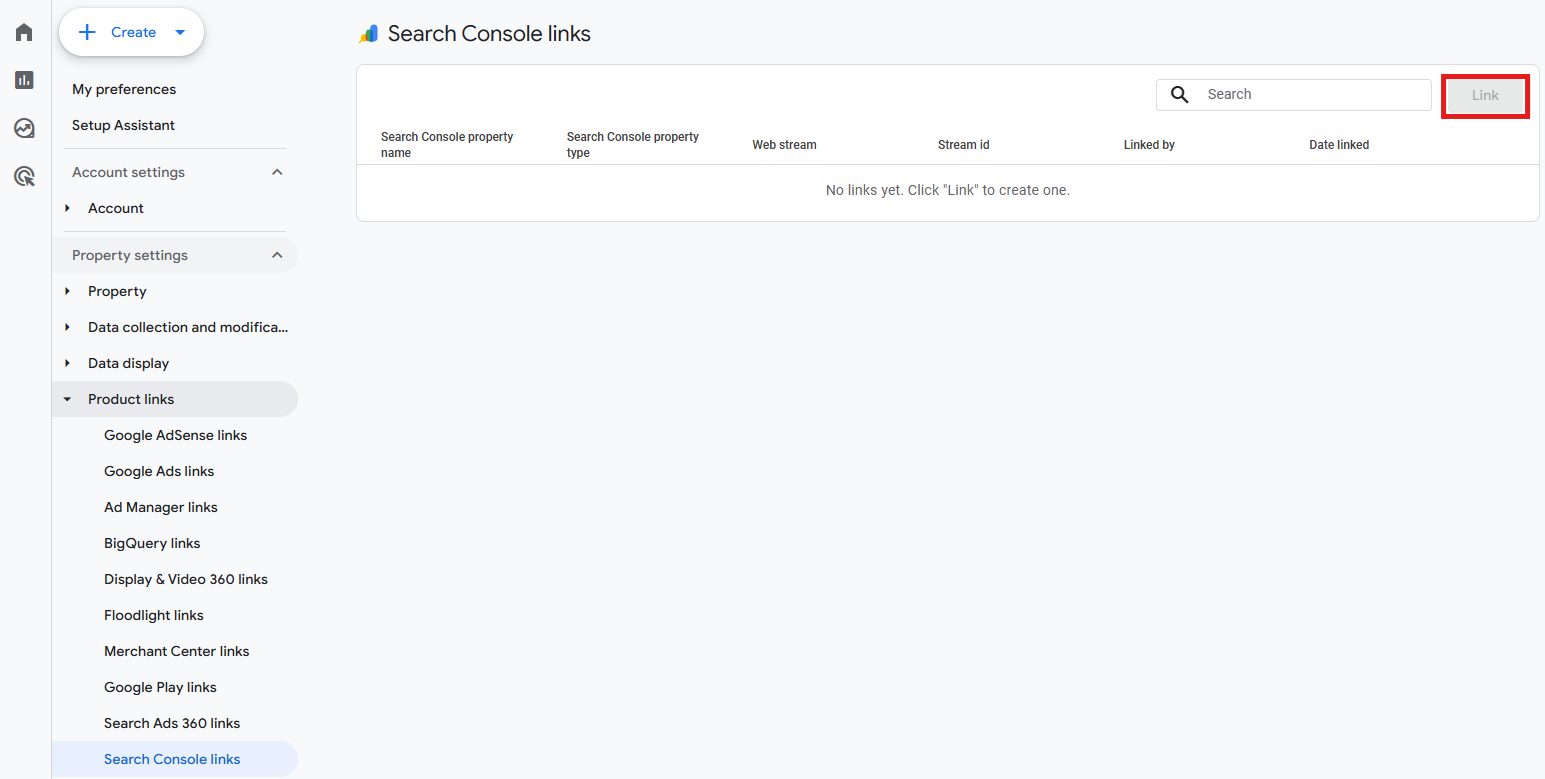
Go to Admin > Product links > Search Console links > Link account(s). This way, you can pull organic queries and landing page context into GA4.
-
BigQuery
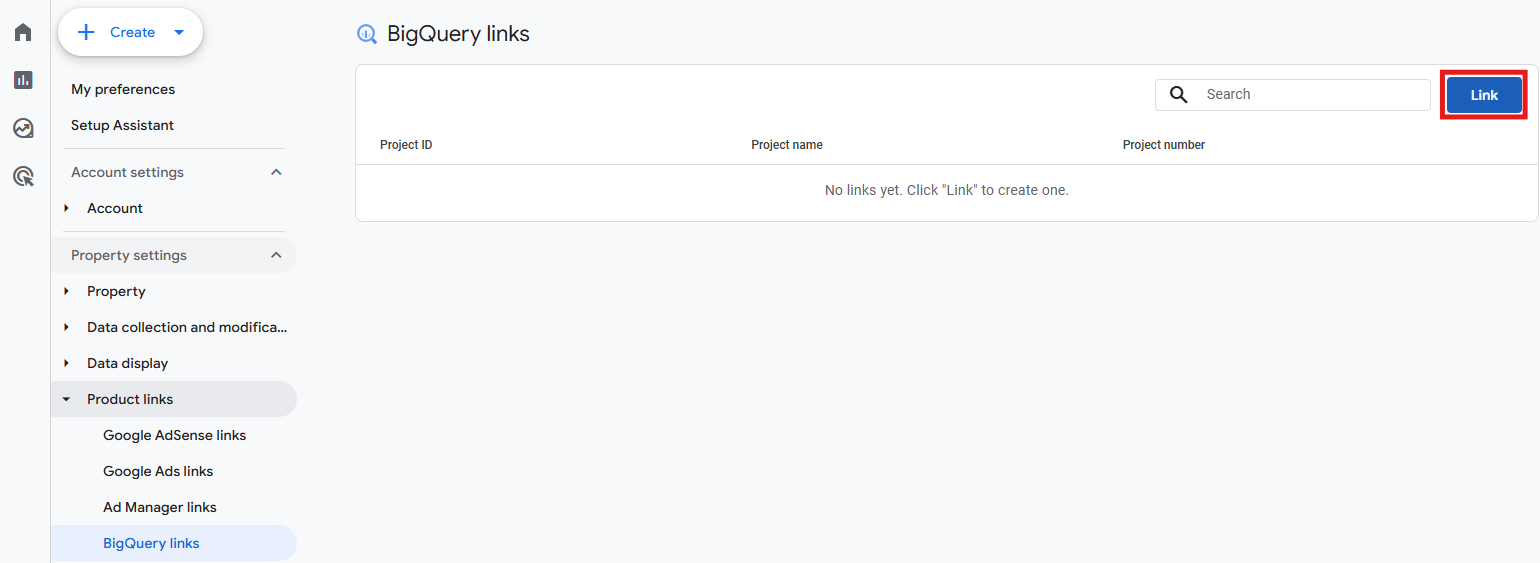
Go to Admin > Product links > BigQuery links > Link account(s). It gives you unsampled raw events for advanced analysis and joins with CRM.
13) Final verification and troubleshooting
Now that most of your GA4 configuration is done, run another round of validation – just like in step 5).
14) Set up a test property
It’s always risky to experiment on a live property, so setting up a test property allows you to try changes safely:
- Create a second GA4 property for testing.
- In GTM’s Google tag, add that test property as an additional destination.
- Try out every new tag or settings there and only then ship them to production.
15) Generate and customize reports
To create useful reports for you or your team, with key weekly or monthly views, you have a few options in the Reports panel:
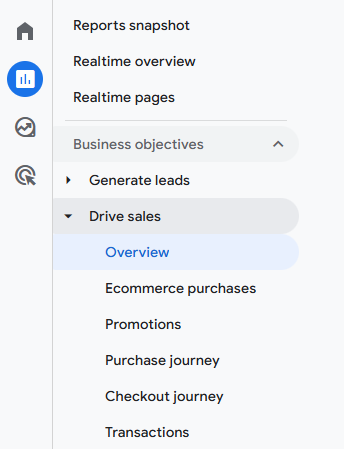
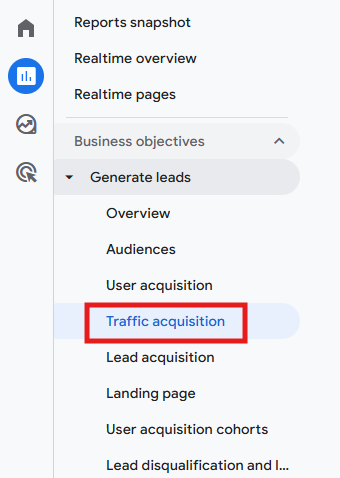
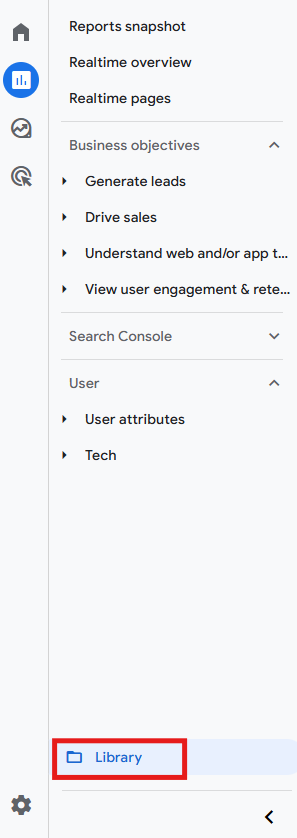
- Business objectives > Generate leads > Traffic acquisition: Check where users come from.
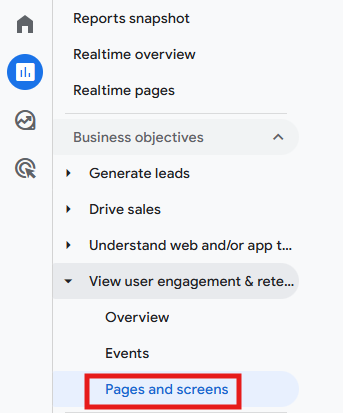
- Business objectives > View user engagement & retention > Pages and screens: Check top content and on-page behavior.

- Business objectives > Drive sales (if applicable): Check the revenue and e-commerce events.
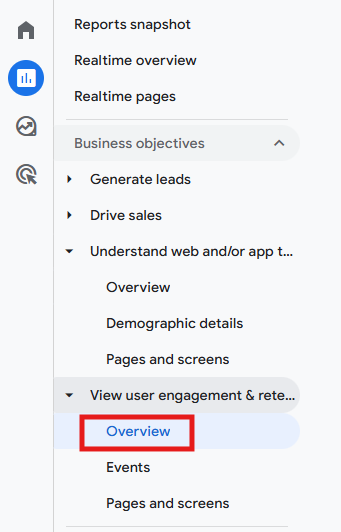
- Business objectives > View user engagement & retention > Overview: Check if new users are coming back.
For easier access to the reports you need, you can also customize your left menu by following these steps:
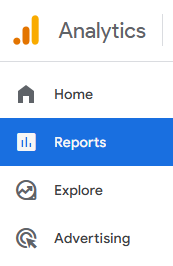
- Go to Reports > Library (bottom left).
- Add all the collections you need (e.g., Acquisition, Engagement, Monetization). Re-order them as you wish.
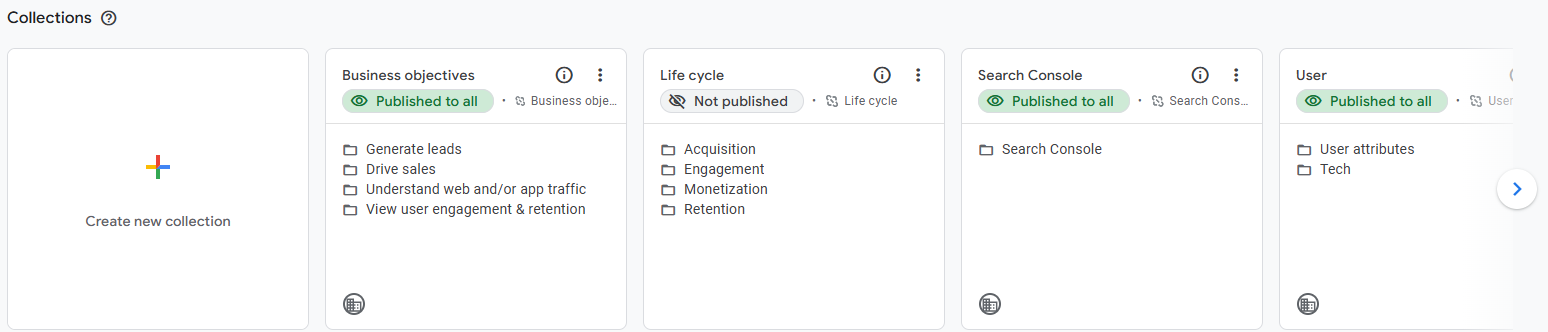
- Click Publish.
If you need to share a report with someone instantly or schedule it, you have a couple of options:
- Click on any report > Share > Share link (permissions apply).
- Click Share > Schedule email to send PDFs to stakeholders (choose frequency and recipients).
- Click Export
16) Share access to your account
If you need someone else to manage the same account, follow these steps:
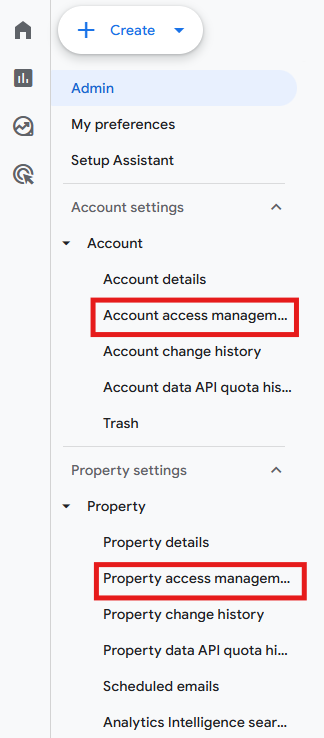
- Go to the Admin panel. Under Account or Property, click Access Management.
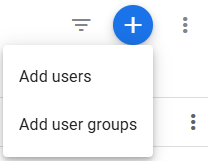
- Click on + and then Add users or user groups.
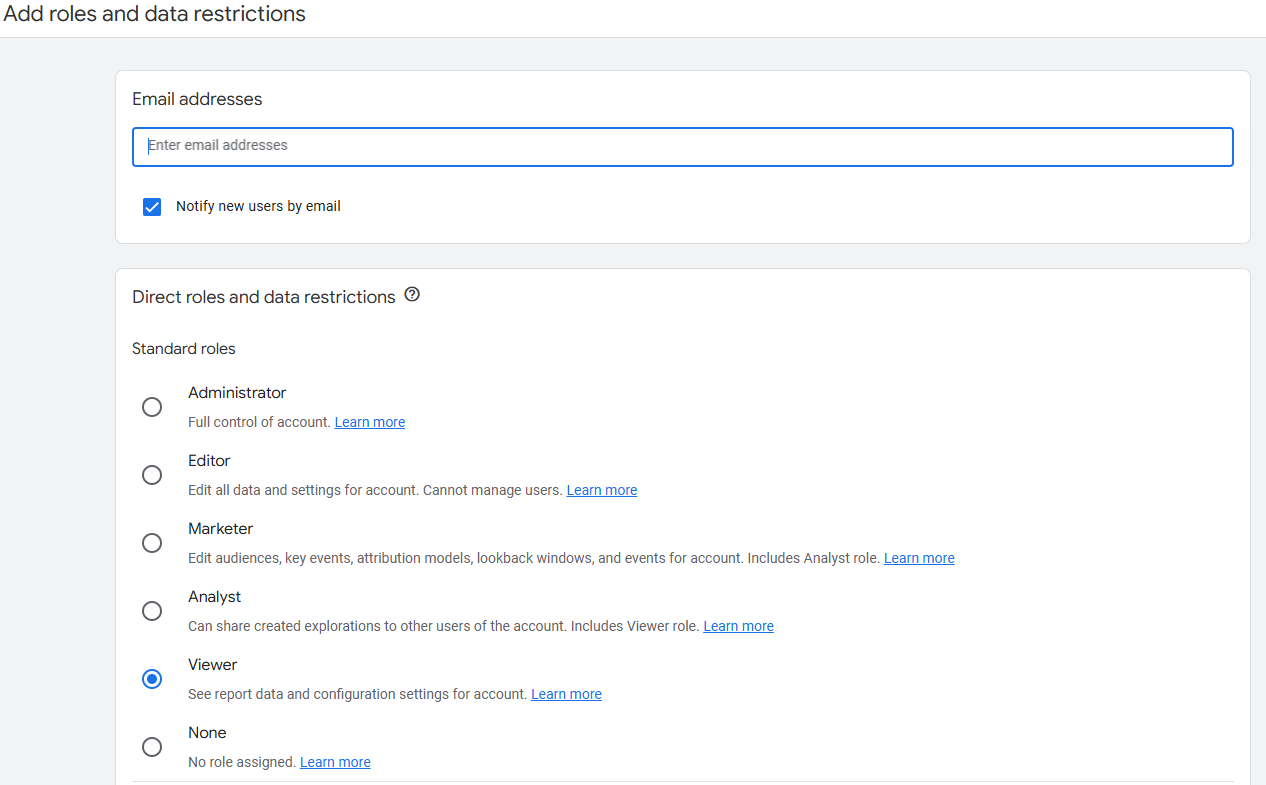
- Invite by e-mail and assign a role:
- Administrator: Full control (we recommend to use this sparingly).
- Editor: Configure settings, tags and links, but has no user management.
- Marketer / Analyst / Viewer: Create/see reports, so there are fewer risks.
Tips: for agencies, we recommended granting Property-level access (Editor or Analyst). Keep Account Admin with your company.
17) Ongoing QA
Keep your data in good shape with regular Quality Assurance (QA). Implement things like:
-
Quarterly QA
Think of this as a health check or a quick audit. Use GA4’s DebugView to ensure the correct events fire only once and that all important parameters are included. If you’ve linked GA4 to BigQuery, also check for any duplicate transaction IDs.
-
Release checklist
A quick checklist to follow whenever your website or CMS changes will prevent a lot of problems. Test changes thoroughly before you put them live. Immediately after that, test the same steps on the live site. And for the first 24 hours after the changes, quickly check the Realtime report to confirm everything is as it should be.
-
Make use of your test property
Don’t test new tags on your live website. Send them all to a test property first. Only when they work properly in the test property should you add them to the live environment.
-
Review access management
Check who has access to what every three months. Also, when an agency or freelancer stops working with you, remove their access in the same week.
What’s next? Server-side Google Tag Manager
If you’re having trouble with ad blockers and third-party cookie restrictions, or if you want more control over where your data goes, server-side tagging is the next step. It sends the data through your server before it reaches GA4/Google Ads, making it more reliable, speeding up your pages, and improving how you manage your data.
We have another article that goes into detail about when this is a good idea, how much it costs, and how to set it up.