If you’re running marketing campaigns without Urchin Tracking Module (UTM) parameters, you’re pretty much gambling with your budget. GA4 reports will show you that people are landing on your website, but you won’t know which e-mail, social media post, or ad brought them. Much of it will simply be labeled as “direct”, leaving you to guess what’s truly successful.
UTMs are simple tags you attach to your campaign URLs that tell GA4 exactly where each website visitor came from. Once you learn how to create them and interpret the data in GA4, you can see which marketing efforts are paying off and which ones aren’t.
What UTM parameters do for your campaigns
When someone clicks a link with UTM parameters, GA4 records this information and adds it to your campaign reporting. For instance, instead of sharing a plain link in your campaign e-mail…
… you would share this tagged version:
GA4 will recognize from those parameters that this visitor arrived at your website through your spring launch campaign newsletter. Without them, this visitor would almost certainly be classified as “direct”, and you wouldn’t be able to tell that your email prompted the visit.
What good are UTM parameters? They help you clearly see which e-mail campaigns generate the most sales, which Instagram or Facebook ads are more effective at turning viewers into customers, and whether specific affiliate partnerships are worth the commission you pay. Plus, you don’t have to worry about them slowing down your pages or affecting how they perform.
UTM parameters you need to know
GA4 technically supports 9 UTM parameters, but you’ll likely use 7 regularly: 3 are required, and the other 4 are optional.
3 non-negotiable parameters
Without these, GA4 won’t accurately categorize your traffic, leading to incomplete or incorrect campaign data. So, always include them in every tagged URL:
-
utm_source
This tells GA4 where the traffic came from (specific platform or referrer). When applying it, use specific names: utm_source=facebook, utm_source=linkedin, utm_source=march_newsletter.
-
utm_medium
This identifies the type of marketing channel. GA4 uses this to group your traffic into its default channel groups. Common values are: utm_medium=email, utm_medium=cpc, utm_medium=social, utm_medium=affiliate.
-
utm_campaign
This specifies the particular campaign you’re running. Use it to differentiate between various initiatives or promotions. Examples: utm_campaign=summer_sale, utm_campaign=product_launch_2024, utm_campaign=webinar_series.
4 optional parameters
These UTMs are not necessary, but they add detail to your analysis:
-
utm_content
This distinguishes between multiple links in the same campaign. It is especially helpful for testing different creative ideas or comparing link placement within the same email or ad. If you’re testing two different email subject lines or two different ad images in the same campaign, tag them as: utm_content=subject_line_a and utm_content=subject_line_b. This allows you to see which specific variation generated more clicks and conversions.
-
utm_term
Originally designed for paid search keyword tracking, this parameter indicates which search terms trigger your ads. For example, if someone searches for “project management software” and clicks your ad, you’d tag it as utm_term=project_management_software. Marketers use this exclusively for manually tagged paid search campaigns, so remember: if you’re running Google Ads with auto-tagging enabled, don’t manually add utm_term because it will cause data discrepancies.
-
utm_id
This UTM assigns a unique identifier to your campaign, making it easier to match GA4 data with campaigns tracked in other platforms. Most marketers don’t use it unless they’re managing campaigns across multiple analytics or advertising platforms and require precise cross-platform tracking.
-
utm_source_platform
This one identifies the platform or tool used to manage the campaign. It shows up in GA4 standard reports as “Session source platform”, both in Traffic Acquisition and Explorations, making it more practical for campaign tracking.
Other GA4-specific parameters
GA4 introduced two additional parameters that you probably won’t need to use, but it’s still important to know them:
- utm_creative_format
- utm_marketing_tactic
These were designed to capture more detailed campaign information, such as creative type or targeting strategy. The problem? They’re not currently accessible in GA4’s standard reports, making them impractical for most marketers. So, stick with the 7 parameters mentioned above until these features become more functional in the interface.
How to build your UTM-tagged URLs
Adding UTM parameters to your URLs follows a specific structure. Don’t worry, you won’t need to memorize the syntax because you can use a URL builder tool, but understanding the basic structure helps you be more aware and troubleshoot more easily when something doesn’t look right.
The basic syntax (manual method)
Start with your destination URL, add a question mark (?), then add your first parameter. Each additional parameter should be separated by an ampersand (&). Here’s an example:
If you want to add UTMs to a URL that already contains parameters, use an ampersand before adding your data. Example:
Using a URL builder tool (automatic method)
Instead of manually typing each parameter, use Google’s Campaign URL Builder. All you need to do is fill in the fields, and it will generate your complete tagged URL. Then, copy that final URL into your email platform, social ad, or wherever you’re running the campaign.
Tip: keep a spreadsheet with all your tagged URLs. This creates a historical record of every campaign link you’ve created and ensures everyone on your team uses consistent naming conventions.
How to find your campaign data in GA4
Once your tagged URLs go live and people start clicking them, GA4 automatically collects that UTM data. There are two acquisition reports that use your UTM data in different ways:
-
Traffic Acquisition uses session-scoped dimensions (Session source, Session medium, Session campaign). This shows you the source of each session, even if a user has multiple sessions from different sources. For most campaign tracking, the Traffic Acquisition report provides a clearer picture because you want to see which current campaigns are driving sessions and key events (conversions).
-
User Acquisition uses first-touch dimensions (First user source, First user medium, First user campaign). This shows you the original source that brought each user to your website for the first time, regardless of how they returned later. So, use the User Acquisition report only when you specifically want to understand what initially brought users to your website.
For now, we’ll focus on the Traffic Acquisition report since it’s the most revealing for this purpose. Here’s where to find it:
-
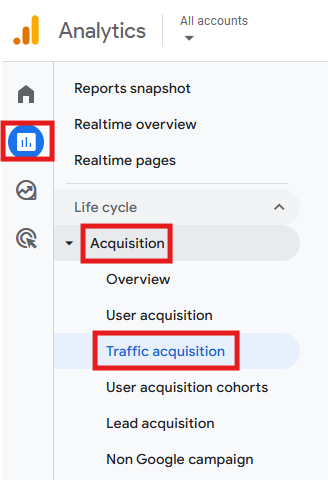
In your GA4 property, navigate to Reports > Acquisition > Traffic acquisition.
-
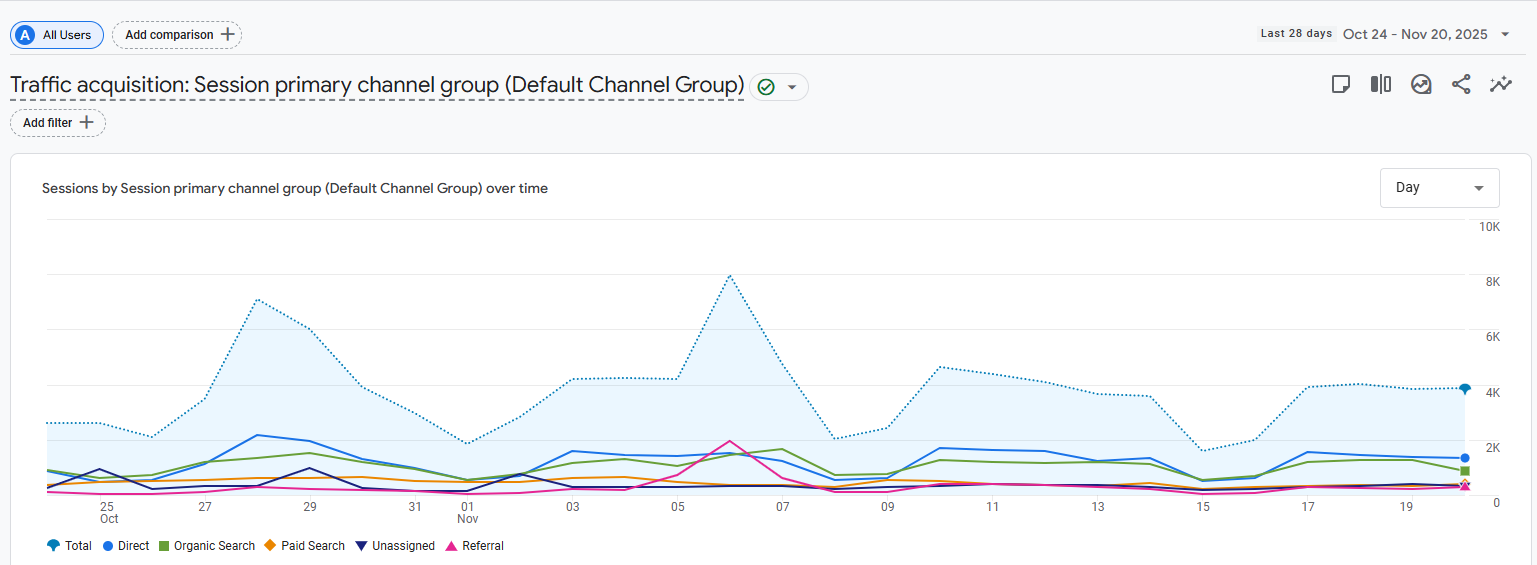
This report shows you session-level data (every time someone arrives on your website through your tagged links, it shows up here). The default view shows “Session default channel group”, which groups your traffic into broad categories like Email, Paid Social, Organic Search, among others.
-
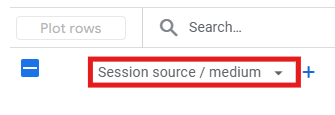
To add campaign dimensions and get more detail, click the dropdown (below the graphic) where it says “Session default channel group” and change it to Session source / medium. This shows you the specific combinations of source and medium from your UTM parameters.
-
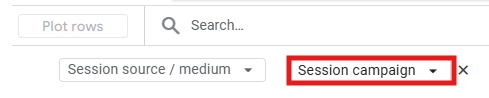
If you want even more detail, click the + symbol to add a secondary dimension. Add Session campaign to see the full picture: which source, through which medium, for which specific campaign.
Creating custom reports in Explorations
The standard acquisition reports work well enough for quick checks, but you’ll eventually want more flexibility. Another option to access UTM data in GA4 is to create custom reports in Explorations:
-
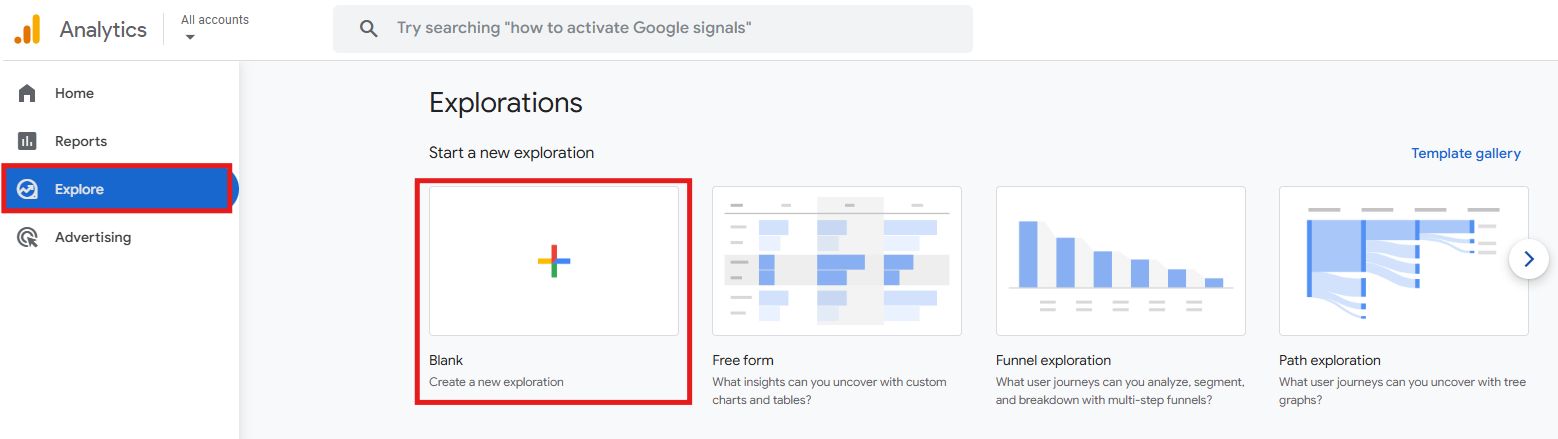
Go to Explore in the left menu and click Blank to create a custom exploration.
-
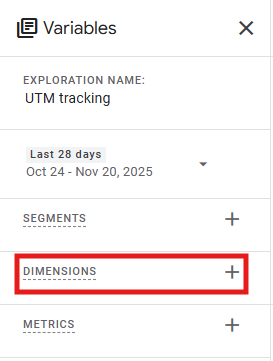
In the Variables panel on the left, look for Dimensions and click the + symbol.
-
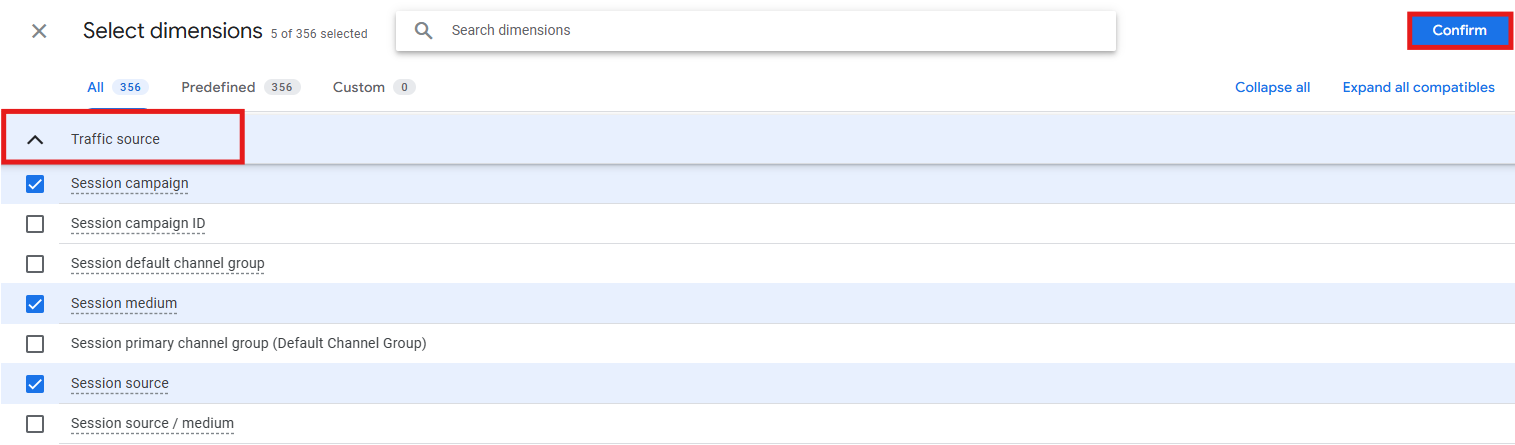
Add the dimensions you need, such as Session source, Session medium, Session campaign, Session manual ad content (for utm_content), and Session manual term (for utm_term). Then click Confirm.
-
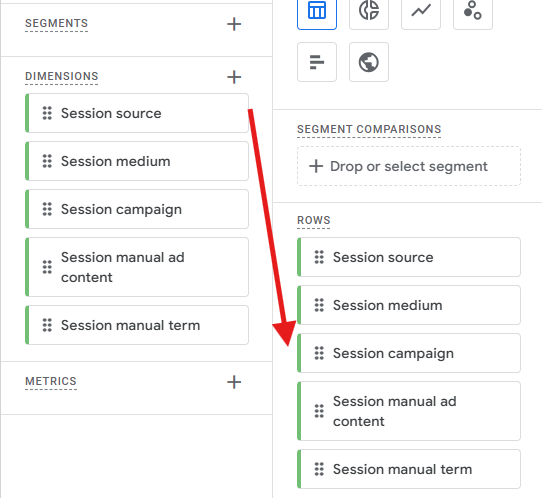
Drag those dimensions into the Rows section.
-
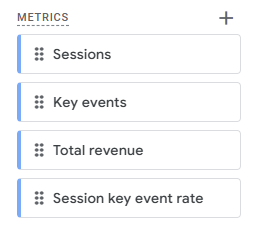
Now add the metrics you care about (such as Sessions, Key events, Total revenue, or Session key event rate).
-
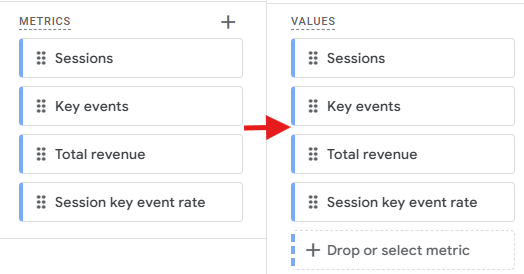
Drag them into the Values section.
-
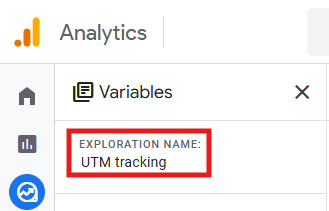
Now you can analyze that data. This report provides a flexible workspace where you can filter your campaign data as needed to answer specific questions about performance. Before closing the report, give your Exploration a clear name so you can revisit it later.
Best practices in UTM tracking
To get campaign data that’s actually helpful, you have to be consistent and follow a process. Here’s what works best:
-
Stick to a naming convention
GA4 is case-sensitive, so “Facebook”, “facebook”, and “FACEBOOK” are treated as three totally different traffic sources in your reporting. Choose one format (lowercase is usually best) and apply it to everything. The same goes for spaces and symbols; decide now if you will use underscores, hyphens, or nothing at all to divide words. For example, “summer_sale”, “summer-sale”, and “summersale” are each considered a separate campaign by GA4.
-
Follow GA4’s default channel group rules
GA4 will automatically categorize your website visits into channels like Email, Paid Search, Organic Social, and Paid Social based on your source and medium values. If you use values that don’t match GA4’s standards, your traffic will be categorized as “Unassigned”. This won’t stop tracking – you can still see the traffic by looking at the source and medium directly – but it will make analyzing your reports more challenging. Therefore, look at how GA4 groups channels by default and match your medium values accordingly.
-
Never tag internal links
UTM parameters are meant for external campaigns. Don’t add UTM parameters to links you use to navigate your own website. Why? UTMs override any previous attribution data. If someone finds you through a Google search and clicks a menu link on your site that has UTMs, their current visit isn’t affected. However, if they return directly to your website later, the UTMs from the link on your site will be used. This can damage your attribution data and result in inaccurate reports.
Follow this campaign launch checklist
Before you launch any campaign, run through this quick verification checklist to prevent UTM tracking mistakes:
- Does the URL include all three required parameters: source, medium, and campaign?
- Is this an external link driving traffic to your site? (remember not to tag internal links)
- Did you check your naming convention against your spreadsheet?
- Did you test the link to make sure it goes to the correct page?
- Did you save the final URL to your spreadsheet with the campaign details?
Final thoughts
If you’re running any marketing campaign, you need UTM parameters. It’s really that simple. They’re what separates just guessing if your campaigns are successful from knowing they are. Start simply by:
- Tagging your next campaigns with only the 3 required parameters: source, medium, and campaign.
- After a few days, look at the Traffic Acquisition reports in GA4.
- Check which campaigns are really driving engaged sessions and key events.
Once this is set up, you can add extra details like utm_content to test different versions or gather more detailed information. But even with just the basic three parameters, you’ll gain a better understanding of your campaigns than most marketers get from their analytics.