If you’re already using GTM, have a GA4 account, and the Google tag is running on every page of your site, you’re ready for the next step. If not, you should first read our “Google Analytics 4 setup checklist for new adopters” and “How to set up Google Tag Manager on your website” articles.
We’ll show you how GTM and GA4 work together, from mapping your measurement plan to GA4 events, to using parameters and variables, creating the tags and triggers, and making sure the events show up correctly in GA4. We’ll also discuss the key details for combining these two tools.
1) Map your measurement plan to GA4 events
Before you start in GTM, decide what you want to track and how GA4 should receive that information (you might have already done this if you used our checklists for setting up and migrating to GA4). Because GA4 treats everything as an event, carefully choose your event names and parameters from the start:
-
Start with outcomes
Open your measurement plan and list all your business goals. Then, for each goal, write down the user action that proves it happened and any extra context you’ll need later when looking at your reports. Here are a few ideas to get you started:
Outcome Action Context More sales Order completed Order value, currency, transaction ID, coupon, items More qualified leads Lead form submitted Form ID/name, page location, page path, lead type Increase product interest Added to cart Product ID/name, price, quantity, variant -
Prefer GA4’s recommended event names
GA4 has a list of recommended events that will give you better default reports. If the event you need is on that list (for instance, purchase, refund, add_to_cart, view_item, sign_up, generate_lead, page_view), use that exact name and send the parameters GA4 recommends. This will save you time making custom reports.
-
Decide which parameters you’ll actually use in reports
GA4 will gather all the parameters you send, but they won’t appear in the standard reports until you register them as custom definitions. This is a one-time step for each GA4 property (we’ll explain it later).
2) Design a solid GA4 parameter strategy
Parameters are where GA4 shines, but also where many people make mistakes (using inconsistent names, leaving out required info, etc.). A few good habits are enough to keep your data accurate over time:
-
Naming rules
Use lowercase, underscores instead of spaces (form_id, lead_type, page_path), and clear names. Be consistent across all events – if you use lead_type, don’t sometimes use leadType. Also, don’t include personal details: don’t send email addresses, phone numbers, or full names in parameters.
-
Parameter scope
It’s really important to tell the difference between parameters that describe events, users, and items:
- Event parameters describe a specific action (which form, which product, what value, etc.). Example: form_name = demo_request.
- User properties describe the person who does it (country, logged-in status, etc.). Example: is_logged_in = true.
- Item scope describes the characteristics of a product (item_id, item_name, item_brand, etc.). Example: items [item_id = SKU-123, price = 49.99]. Item parameters are only included in events that send an items array.
Tip: only register custom definitions you’ll actually use. This is for efficiency, and because GA4 limits the number of custom definitions per account. However, all your data will still be sent to BigQuery if you set up data export.
3) Prepare variables and triggers in GTM
This is where Google Analytics 4 and Google Tag Manager really start to work together. In GTM, a tag is what sends data, a trigger decides when to send it, and a variable is where that information actually comes from. Your GA4 tag sends only what you specifically tell it to include in its event parameters (and optionally, user properties). For each of those parameters, you will need to tell GTM where to find the information, meaning you have to set up the variables. You’ll do this later, but for now:
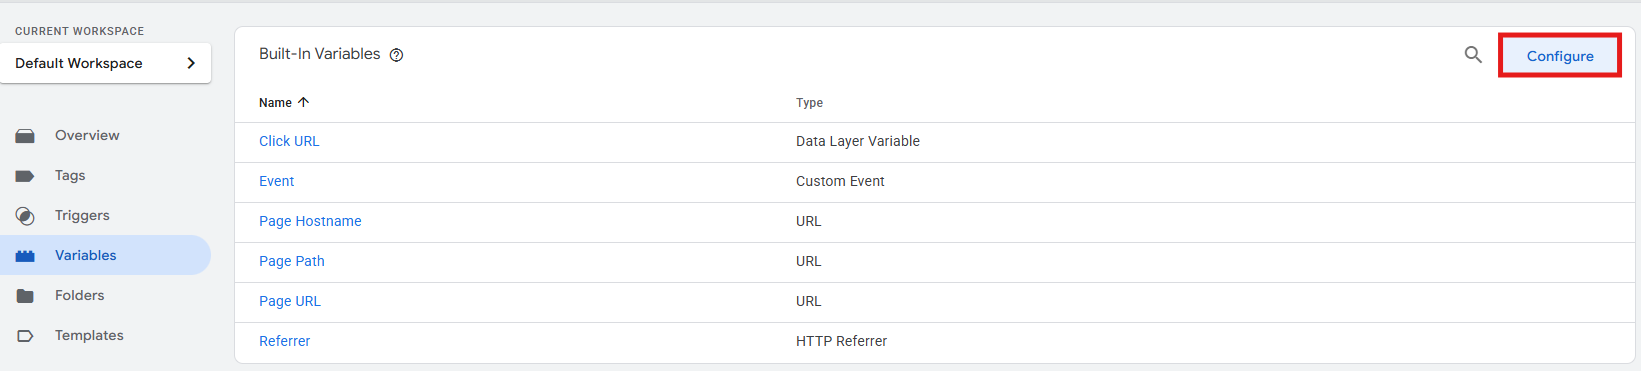
- In GTM, go to Variables > Built-In Variables > Configure.
-
Enable at least these: Page URL, Page Path, Referrer, Click URL, Click Text, Event, Page Hostname, Form ID, Form Classes, Form Target. You can adjust this later on, if needed.
-
If your parameter needs to capture specific data that isn’t covered by built-in variables, you can create a user-defined variable.
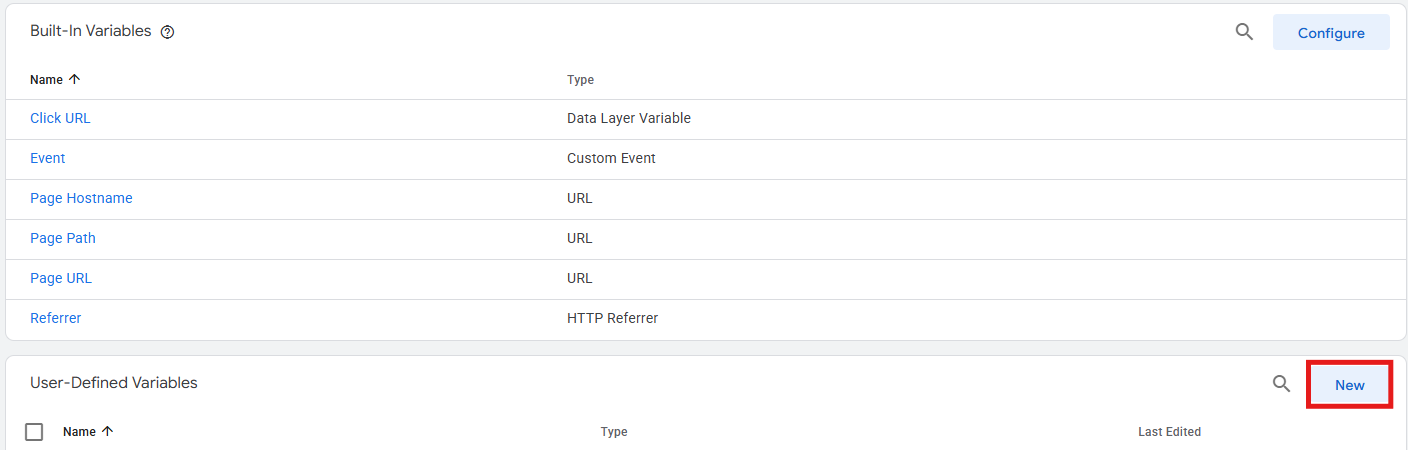
Choose from variable types like:
- URL: it can pull URL components.
- DOM Element: it reads a specific element’s text/attribute (e.g., product name in a visible selector). DOM stands for “Document Object Model”.
- Constant: it retains a fixed value once set.
- Lookup Table: it translates rough inputs (e.g., “/pricing” > “pricing_page”).
- Data Layer Variable: a JavaScript object (named “dataLayer”) where your website can place values that GTM can read safely.
However, those options might require a developer. We suggest starting with the no-code sources available in GTM (either built-in or URL/DOM variables), and if a value isn’t on the page or in the URL, skip it for now rather than guessing.
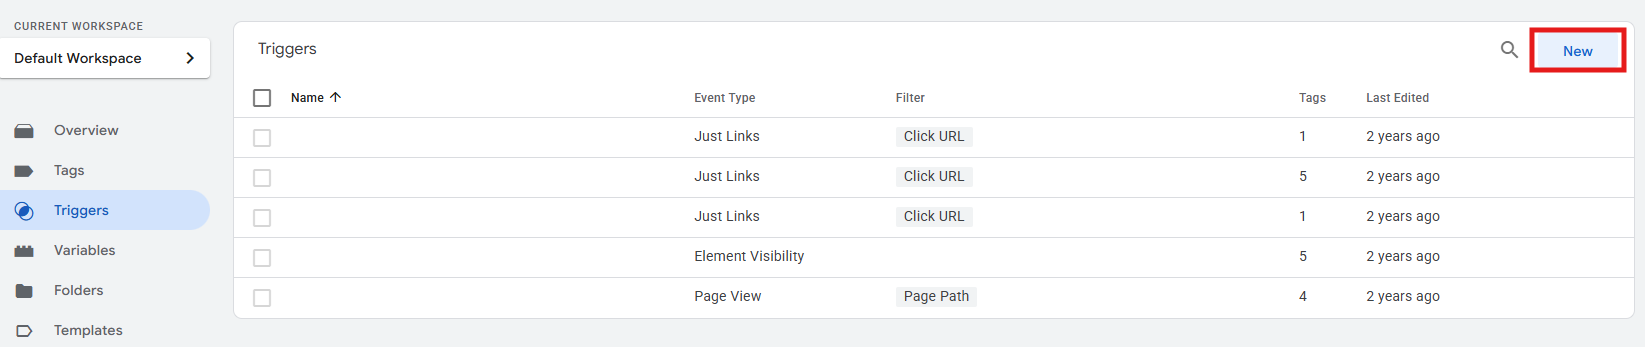
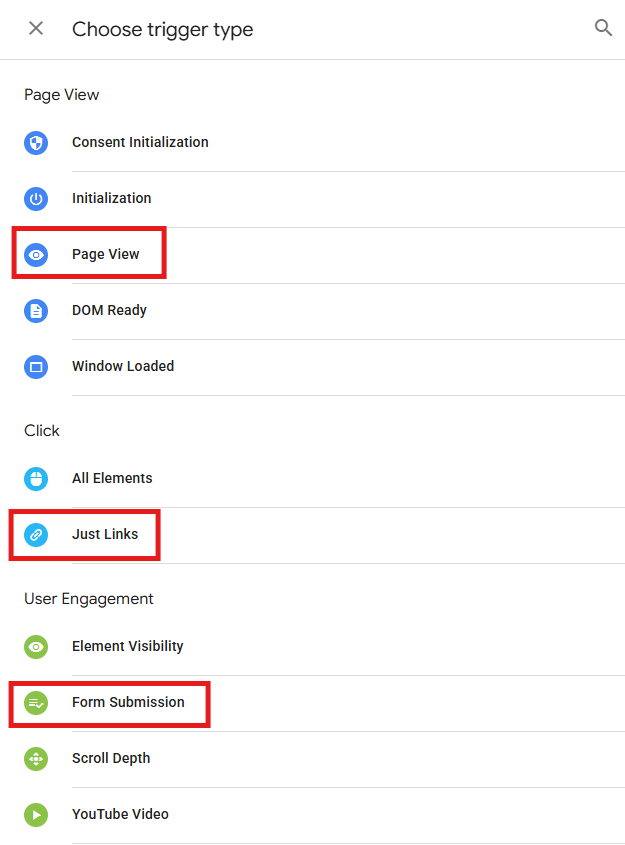
- In GTM, go to Triggers and create the basic ones you’ll reuse, such as:
- Page View: for all page views.
- Click – Just Links: for link/button clicks (outbound/files).
- Form Submission: for successful form submissions.
4) Build an event specification guide
Whether you’re giving this information to developers or doing the work yourself, create a simple event specification sheet and specify what you’ll track with it as you set up GTM. This way, you’ll know exactly what data sources you need in GTM and what custom definitions you’ll eventually need to register in GA4 to see those parameters in your standard reports. That sheet could look something like this:
| Event name | When it fires | Parameters | GTM variable source |
|---|---|---|---|
| purchase | Order confirmation page | transaction_id, value, currency, tax, shipping, coupon, items (array) | URL variable (e.g., order_id / transaction_id); DOM Element (value/total); Constant (currency) |
| generate_lead | Form successfully submitted | form_id, form_name, page_location, page_path | Built-in variables: {{Form ID}}, {{Page URL}}, {{Page Path}} |
| add_to_cart | Add-to-cart click | item_id, item_name, price, quantity | DOM Element (data-sku, data-price, data-qty) or Click Text/URL |
| login | User signs in | method | URL variable (e.g., ?login=success&method=email) or DOM Element (e.g., a visible “Welcome, …”). If neither exists, leave it to add a data layer value later. |
| page_view | On every page load | page_location, page_referrer, page_title | Built-in {{Page URL}}, {{Referrer}}, {{Document Title}} |
Situations when you need a developer
Most marketing events work fine with built-in, URL, or DOM variables. Ask for a data layer when it’s crucial to consider:
- Revenue accuracy: you need transaction_id, value, currency, tax, shipping, coupon, plus a full items array.
- Authentication states: you need a reliable is_logged_in or login_method.
- Invisible info in the UI: the value you need isn’t in the DOM and can’t be found in the URL.
When you’re making your event spec sheet, if any of these situations apply, leave the “GTM variable source” column blank to be filled in later.
5) Create the GA4 Event tags in GTM
Now the implementation begins. For each GA4 Event Tag you want to create, follow these steps:
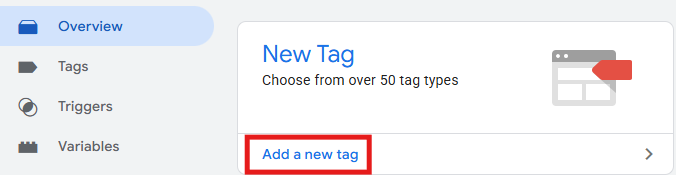
- In GTM’s Overview or Tags section, click New.
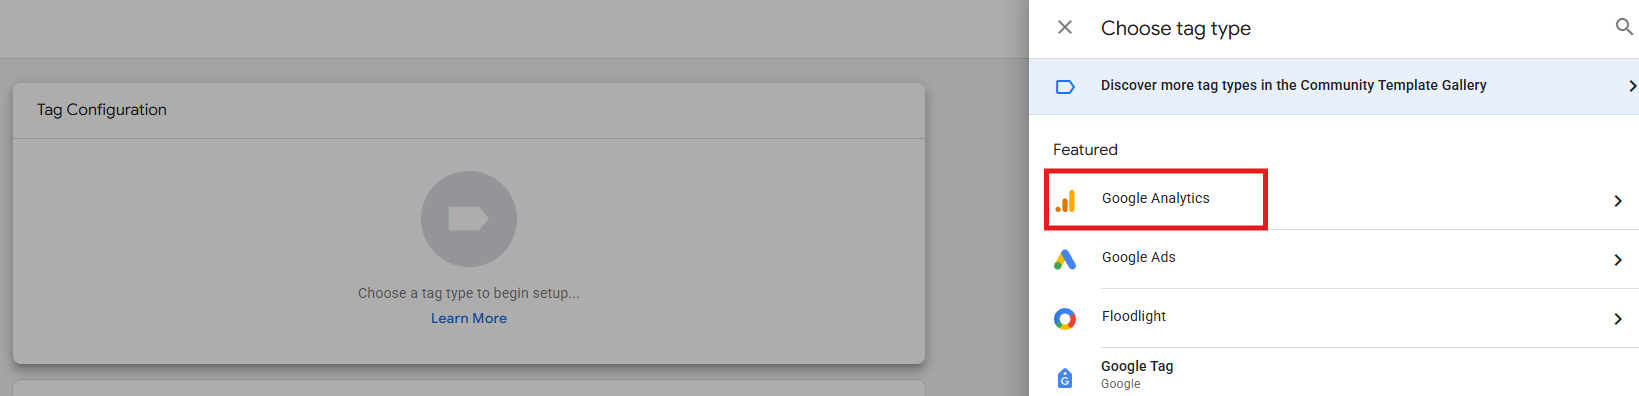
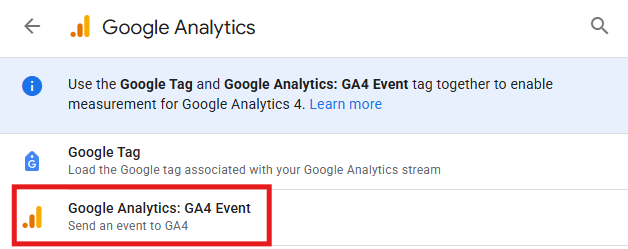
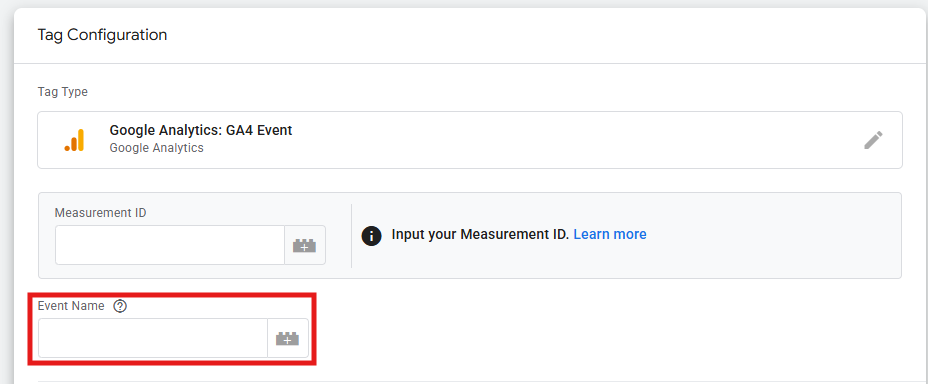
- Under Tag Configuration, choose the tag type: Google Analytics: GA4 Event.
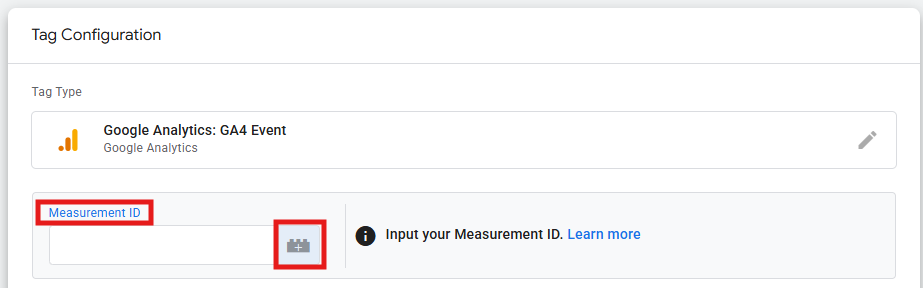
- Select your Google Tag or paste the Measurement ID (selecting the Google tag is a better option, since it reuses consent and shared settings).
- Define the Event Name: e.g., generate_lead.
-
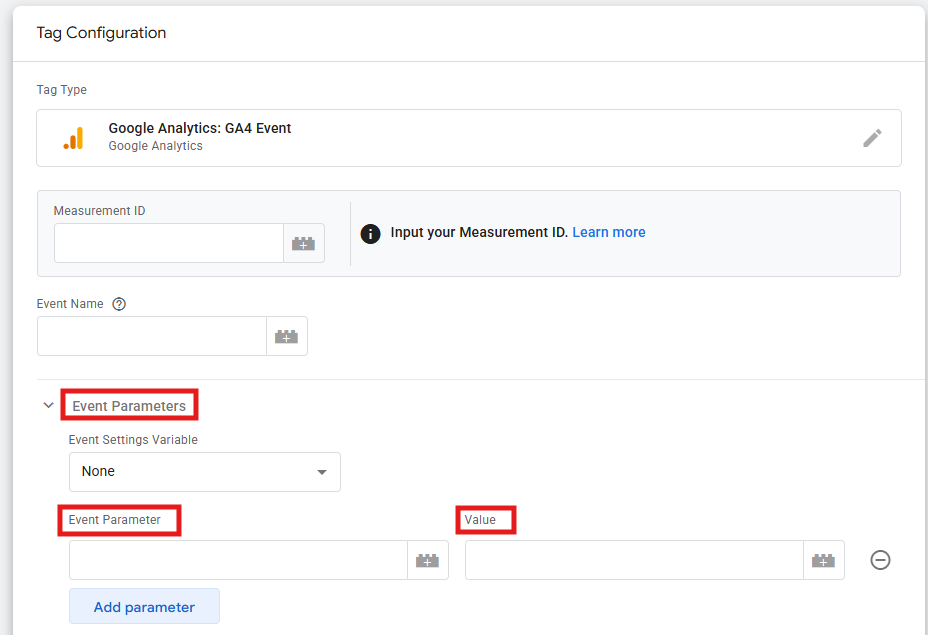
Define the Event Parameters: add parameter rows with information like (example):
- Name: form_id
Value: {{Form ID}} - Name: page_location
Value: {{Page URL}}
If you can’t source a parameter reliably without a developer’s help, omit it for now. It’s better to send fewer, clean parameters than many inconsistent ones.
- Name: form_id
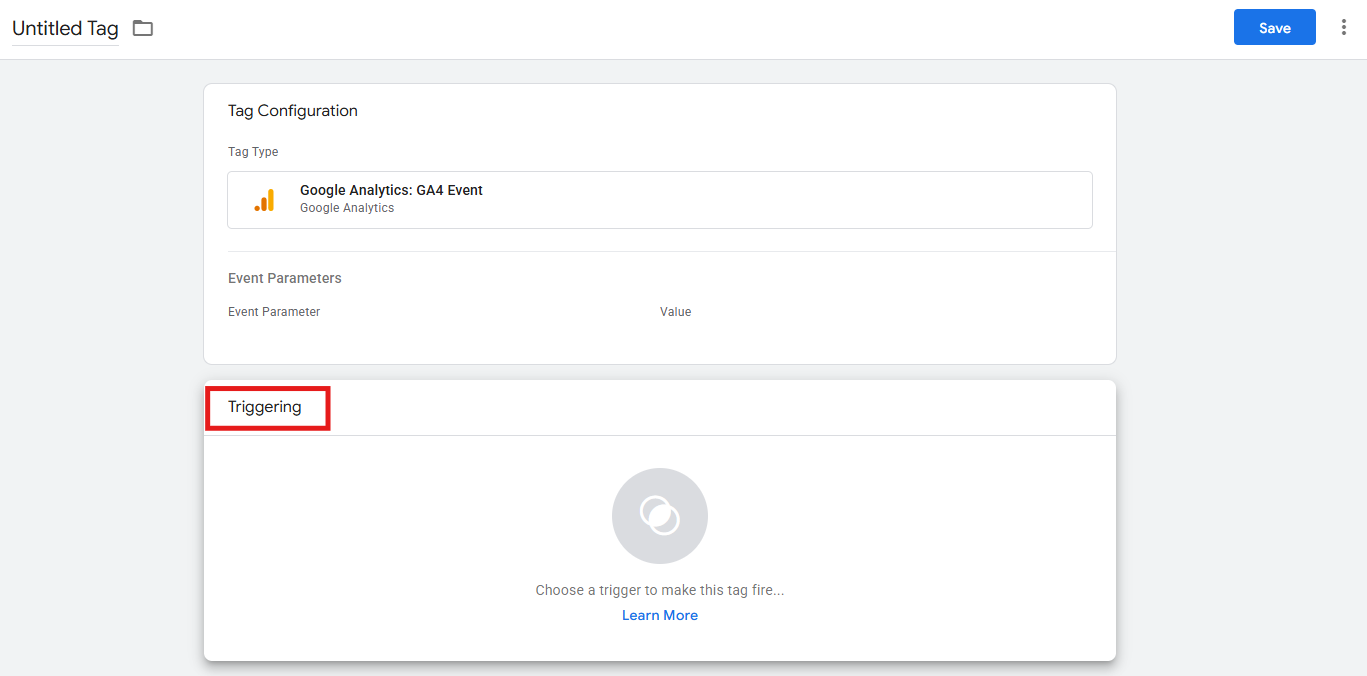
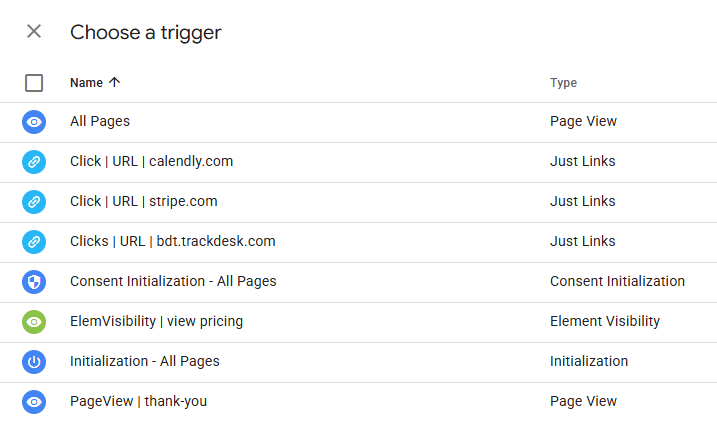
- Define the Trigger: select the trigger that best fits (in this example, the form trigger you created in step 3.4).
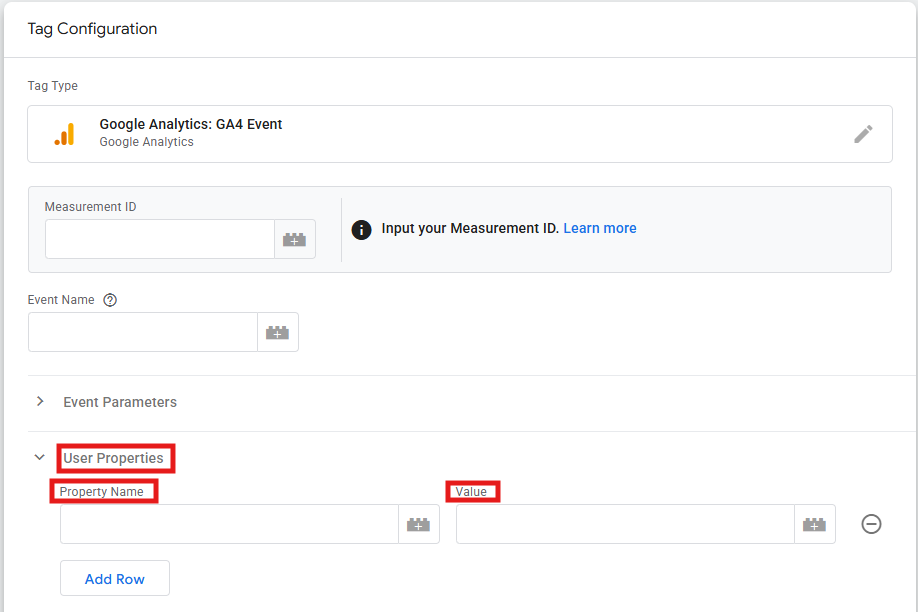
- Set user properties in the tag (optional). In your GA4 Event tag:
- Click User Properties > Add Row.
- Name (example): is_logged_in.
Value: a variable that returns true/false (e.g., a Constant). - Register it later in GA4 (scope: user) only if you’ll actually use it in audiences/reports.
-
For Quality Assurance (QA):
- Use the Preview feature in GTM (which will open the Tag Assistant debug interface) to confirm that events are fired once with the right trigger and that parameter values are populated.

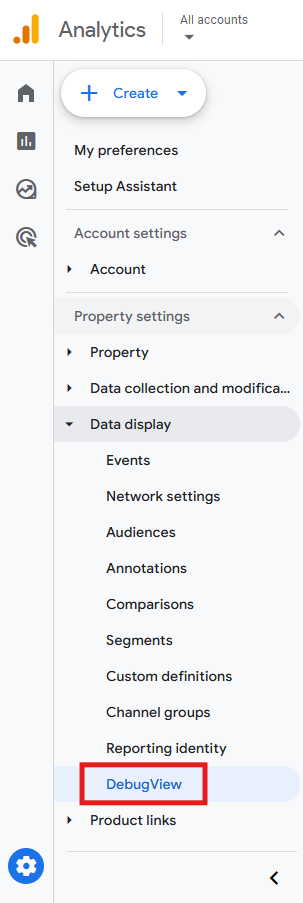
- Then, go to GA4’s DebugView feature to confirm that the same event and parameters are showing up as they should. DebugView shows events instantly, while standard reports can lag several minutes.
Keep in mind!
If you create your own page view, scroll, or outbound link tracking in GTM, be sure GA4’s Enhanced Measurement isn’t already sending those events automatically, or you’ll count them twice. So, either:
- Use Enhanced Measurement only (the easiest option), or
- Turn off the overlapping option in GA4 (Admin > Data collection and modification > Data Streams > Web > Enhanced Measurement) for the specific interaction you’re recreating in GTM (like scrolls), and keep only your GTM version.
6) Register custom definitions in GA4
Once values are flowing, register the parameters you’ll report in GA4 (as defined in step 1.d). To do that:
- Go to Admin > Data display > Custom definitions > Create.
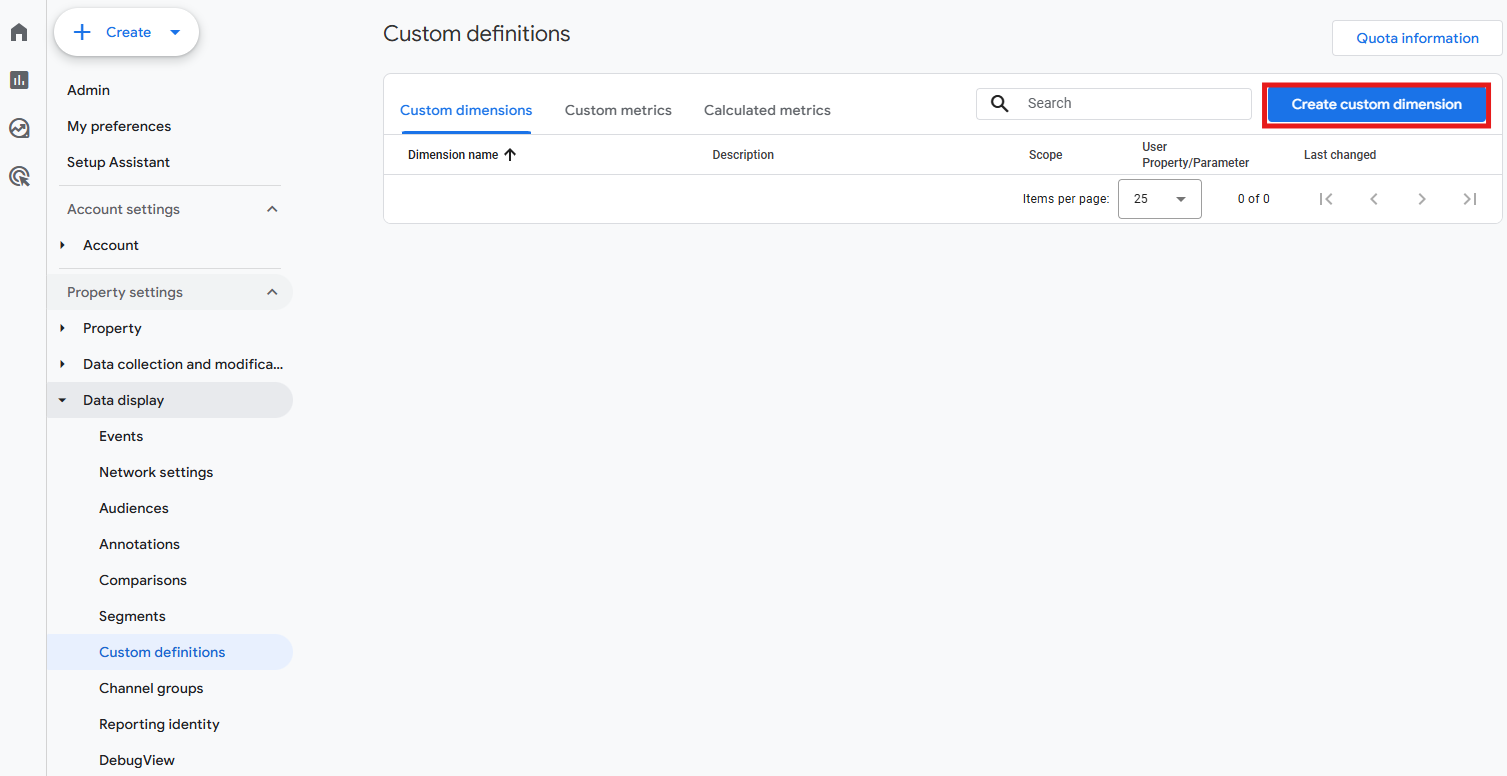
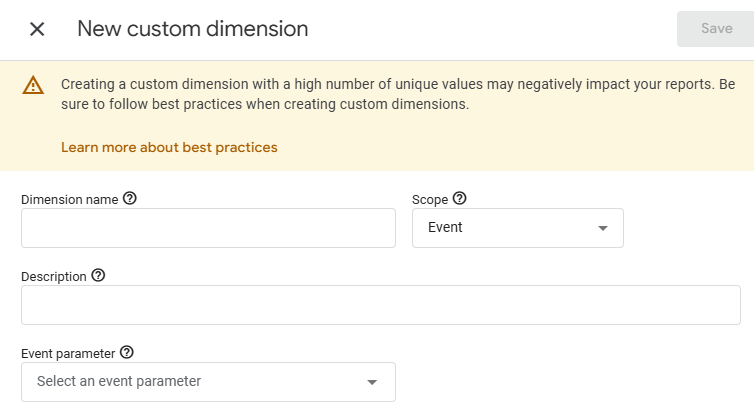
- Parameter/dimension name: make sure it matches what your tag in GTM is sending. If your tag sends “form_name”, register “form_name” exactly as a custom dimension in GA4.
- Define the scope: “event” for most parameters; “user” for stable user properties; “item” for item fields.
Keep in mind: custom definitions aren’t retroactive. Values start populating in standard reports only from the moment you create them.
7) GTM – GA4 integration QA
Want to make sure everything is running smoothly? Go through these audit questions:
| Possible issue | How to check | How to fix |
|---|---|---|
| Is GA4 implemented through GTM? | In GTM, go to Tags, search for Google tag and confirm it fires on all pages. In Tag Assistant (Preview mode), verify that the Google tag fires from your GTM container. | Go through the process of installing the Google tag via GTM (see how in the article “How to set up Google Tag Manager on your website”). Remove any hard-coded GA4/gtag snippets to avoid duplicates. |
| Is PII (Personally Identifiable Information) being redacted before being sent from GTM to GA4? | In GTM, use the Preview mode, click a fired GA4 Event > Parameters, and scan values for e-mails/phones/names/addresses. If you see raw PII, redaction isn’t in place. | Add a user-defined variable (RegEx Table or Custom JavaScript) to scrub PII from URLs/parameters. Map that variable to GA4 parameters. Test again in Preview and DebugView. |
| Are enhanced e-commerce events firing correctly and data flowing to GA4? | In GA4 > Admin > Data display > DebugView, perform a test purchase and verify that the purchase has a transaction_id, value, currency, and a full items array (with item_id, item_name, price, quantity). Cross-check in Tag Assistant that those parameters are populated before the purchase tag fires. | Ensure your GA4 event tag sends the required parameters. If you can’t source them from URL/DOM, ask developers for a data layer that includes transaction_id, value, currency, and items. Remap variables in GTM, then retest. |
| Is any event pushing PII into the GA4 property? | In Tag Assistant (Preview), review every GA4 event’s Parameters for e-mails/phones/names/addresses. In GTM > Variables/Tags, search for suspicious fields like e-mail, phone, or name. | Remove PII parameters from GA4 tags. If the value is needed internally, store it elsewhere (e.g., your backend) and pass only non-PII identifiers to GA4. Add/keep PII redaction in place for URLs and form data. |
| Is there a deprecated Universal Analytics (UA) tag still in the GTM container? | In GTM > Tags, filter “Tag Type = Google Analytics: Universal Analytics”. In Tag Assistant (Preview), verify no UA hits fire. | Pause or delete UA tags, triggers, and variables if they’re no longer used. Remove old UA imports in Google Ads to prevent double-counting. |
| Do any GA4 event tags fire before the Google tag? | In Tag Assistant (Preview), inspect the timeline: the Google tag must load first; GA4 event tags should fire after (on page view, click, or form). | Set the Google tag trigger to “Consent Initialization – All Pages” (or “Initialization” if you don’t use Consent Mode). Ensure GA4 event tags use Page View/Click/Form triggers. Retest order in Preview. |
| Is GA4 tag execution compliant with GDPR/consent rules? | In Tag Assistant (Preview), open the Consent tab and confirm consent states (e.g., analytics_storage) are set before analytics tags fire. Toggle your Consent Management Platform (CMP) to deny/allow and verify if GA4 behavior adapts. In GA4 > Admin > Data collection and modification > Consent settings, confirm Consent Mode is recognized. | Ensure the CMP sets consent before tags fire. Put the Google tag on “Consent Initialization – All Pages” and configure tag-level Consent Settings in GTM. |
8) Versioning GTM changes
Each time you make changes to your tracking, name versions clearly (e.g., “YYYY-MM-DD – GA4 form submits v2”), add notes (e.g., “Added lead_type; fixed double fire”), and publish from Preview.
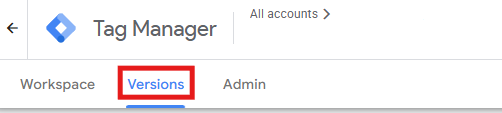
You can always check all saved versions in the “Versions” tab, so if something breaks, you can recover it in seconds.
Final thoughts
GA4 and GTM need each other: GA4 is the engine, while GTM is the steering wheel. To ensure they work together smoothly and that you’re always tracking what you need, start with the basics: map outcomes to events, use GA4’s suggested event names, find a few reliable sources for your data, and implement good Quality Assurance (QA).
Then you can refine it: avoid duplicates with Enhanced Measurement, set up your triggers, consistently name and track versions of your work, and register only the custom definitions you’re actually going to use in reports. Most importantly, treat your GTM-GA4 setup as a product: from the start, prioritize consistency and thoroughness over quick fixes, keep a record of changes, and review it regularly.